FIMO Leather Effect Rainbow Pouch
After creating the fun little FIMO Leather Effect gift tags and toppers for Christmas, I knew a rainbow needed to be next up in my list of things to try! I love that this clay remains flexible after baking, as that makes it the perfect medium for stitching! And we all know how I feel about using different fibers in my crafts! These rainbows are really easy to put together, and they would make such an adorable little gift!
Materials
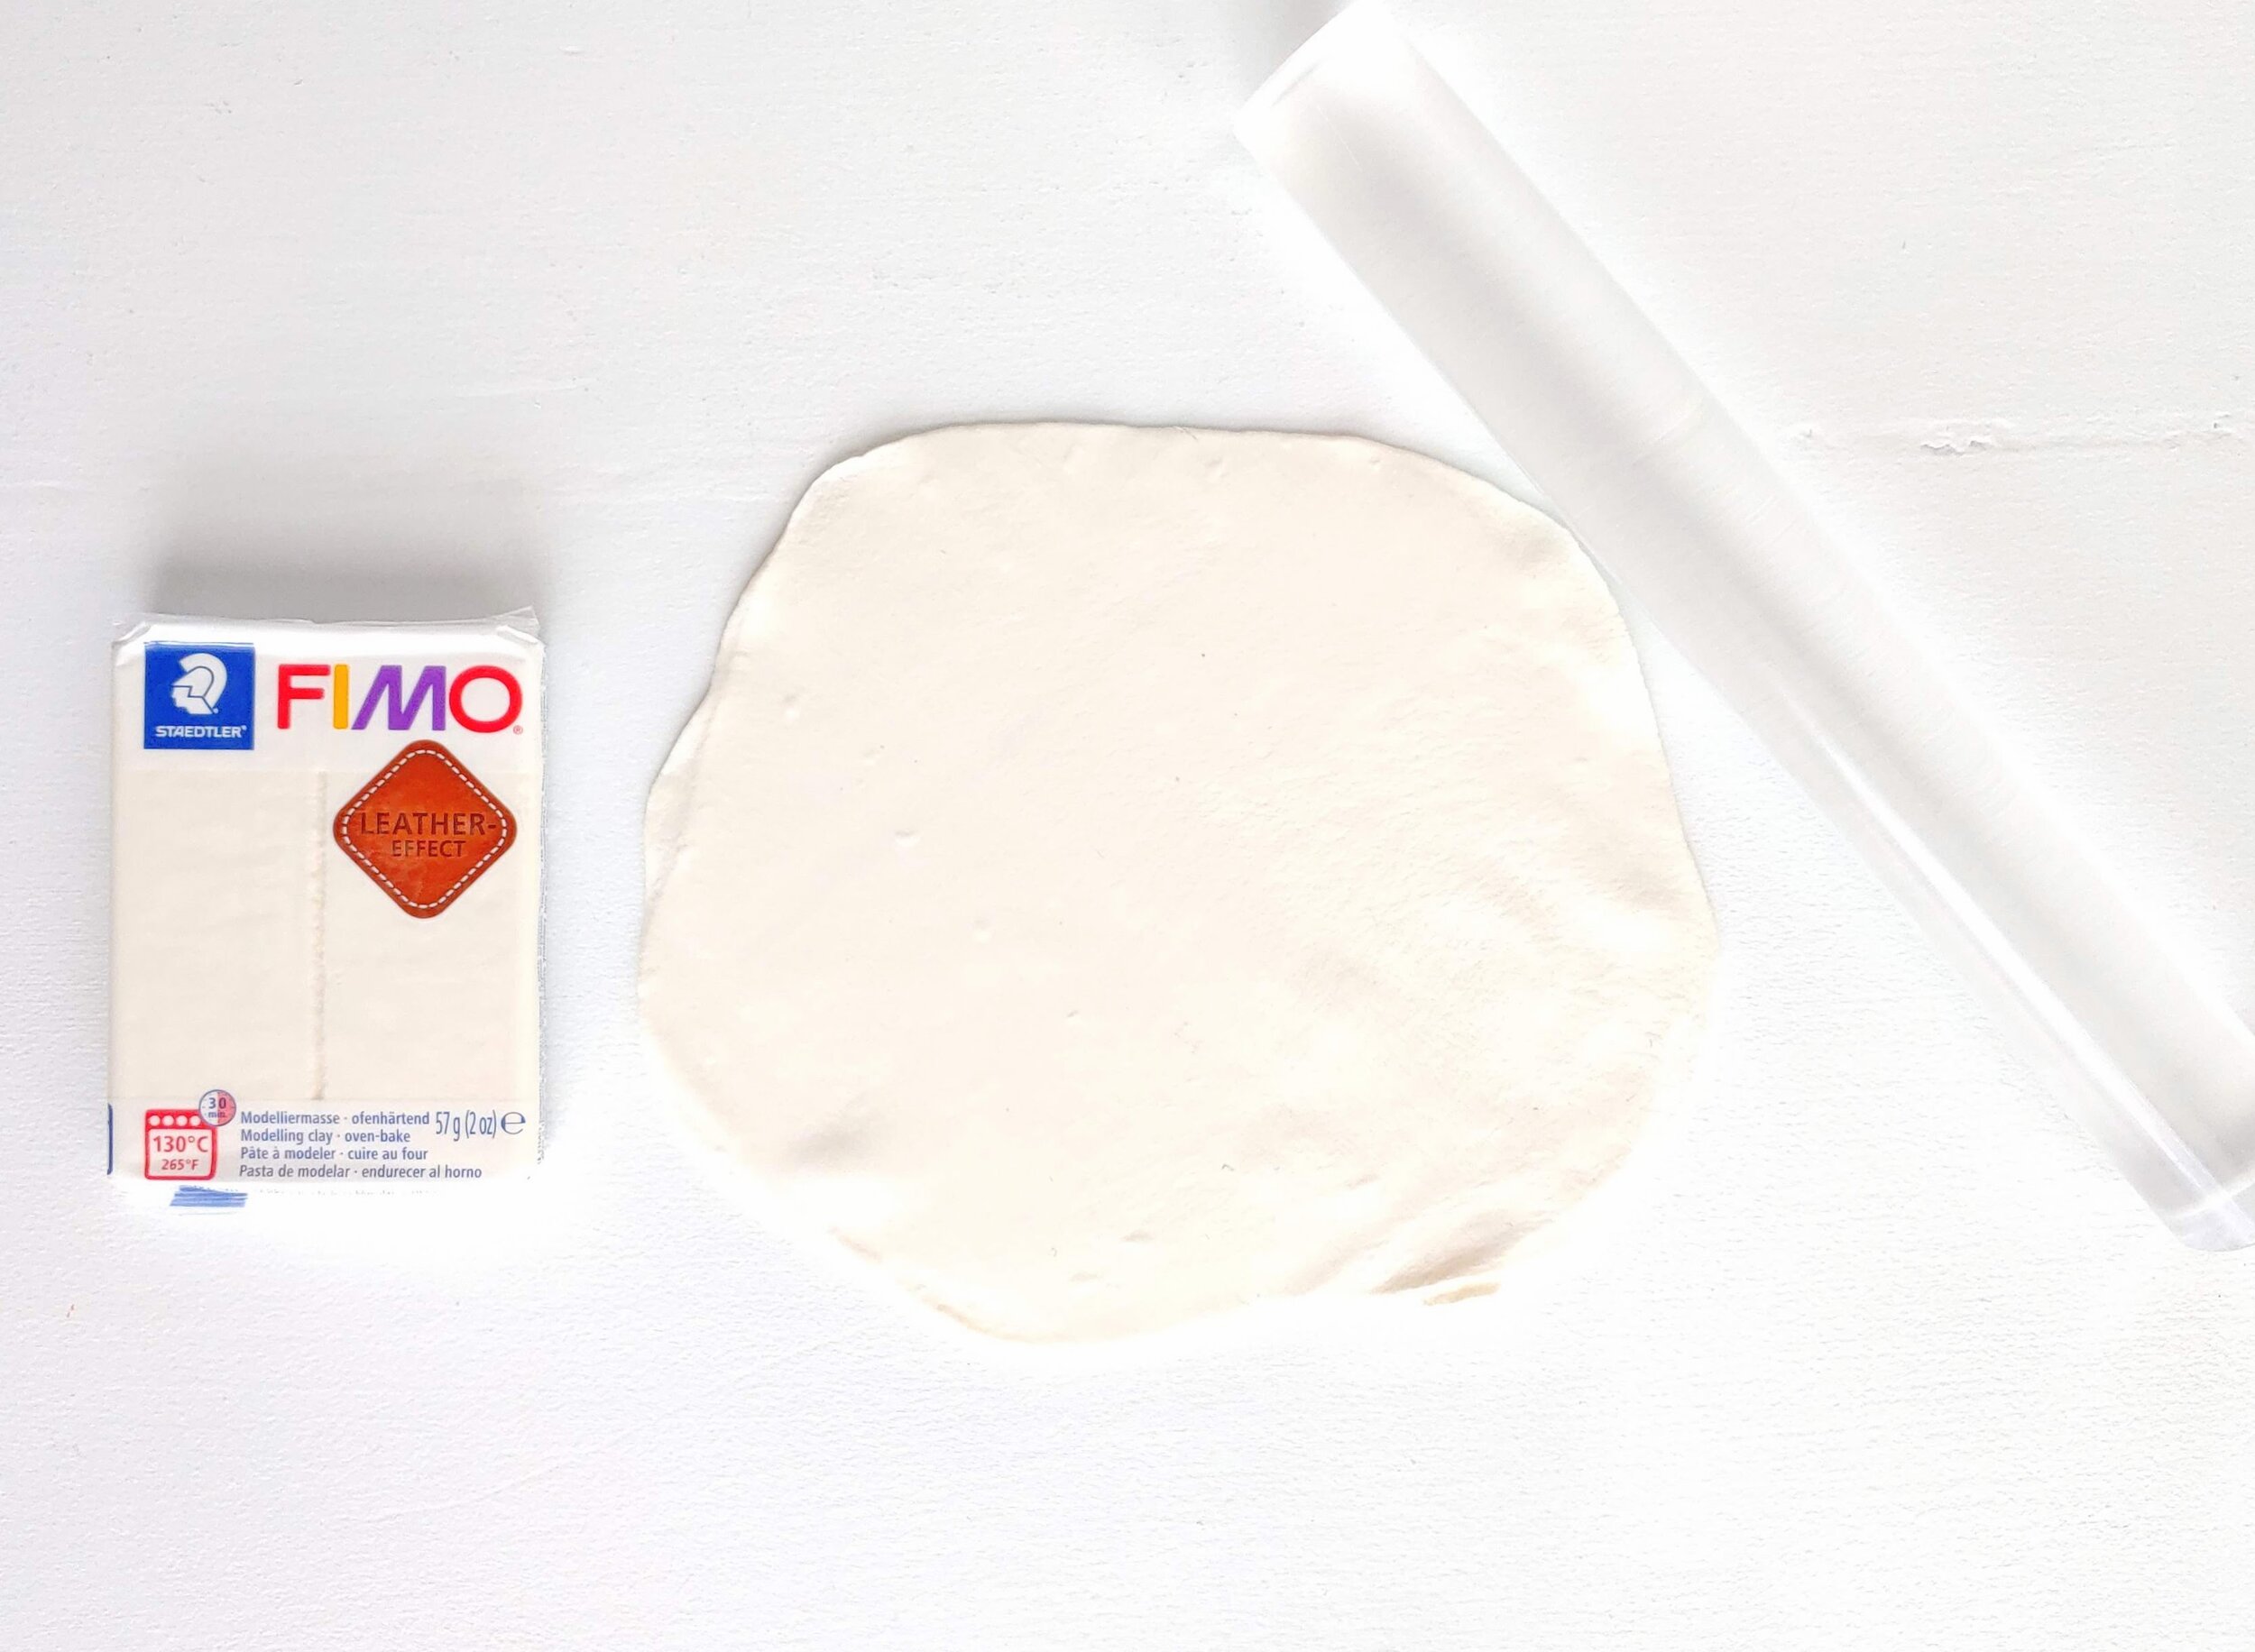
FIMO Leather Effect Clay - You can find this at most Craft Stores like Michaels, Joann’s, and Hobby Lobby. You can also find a multipack HERE on Amazon.
Rolling Pin. I used a clear craft rolling pin, but you can use the rolling pin you use for cooking. Just cover it in plastic wrap or something first so that you don’t leave clay on something you prepare food with.
Small Bowl
A toothpick, metal skewer, or pen to make holes in your clay.
Embroidery Floss
Needle for stitching
Small piece of velcro if you want to close up your pouch. A small snap or button could work as well.
Gorilla Glue for attaching the velcro
A Pom pom or other items for embellishing
How To
Begin by rolling out your FIMO Leather Effect Clay. Do this on a piece of wax paper or a cutting board that is not used for food. The clay can leave residue on surfaces, so make sure your surface is protected. Warm your clay by working with it for a bit, then roll out very thin. Obviously, you don’t want it to tear, but the thinner you can roll your clay, the more flexible it will be after it is baked. I used a clear craft rolling pin for this, but if you want to use the rolling pin you use for cooking, I would wrap it with plastic wrap beforehand. You don’t want to get the clay on something you use with food.
When your clay is thin, you can stretch it a bit with your hands to give it a more leather-like look.

Using a small bowl, imprint into your clay to leave a circle shape. The larger the bowl, the larger your pouch will be. Remove the bow and cut out your circle.

Cut your circle in half, making the two halves of your rainbow.

Using a metal skewer, toothpick, or pen tip, make small holes all around the circular edge of your rainbow. You can make as many rows of stitching as you would like. Make sure to poke holes that go all the way through the clay and that can fit a needle through when you are stitching. Poke holes on both sides of your rainbow.
Bake your rainbow pieces according to the directions on the clay packaging. Allow to cool completely.

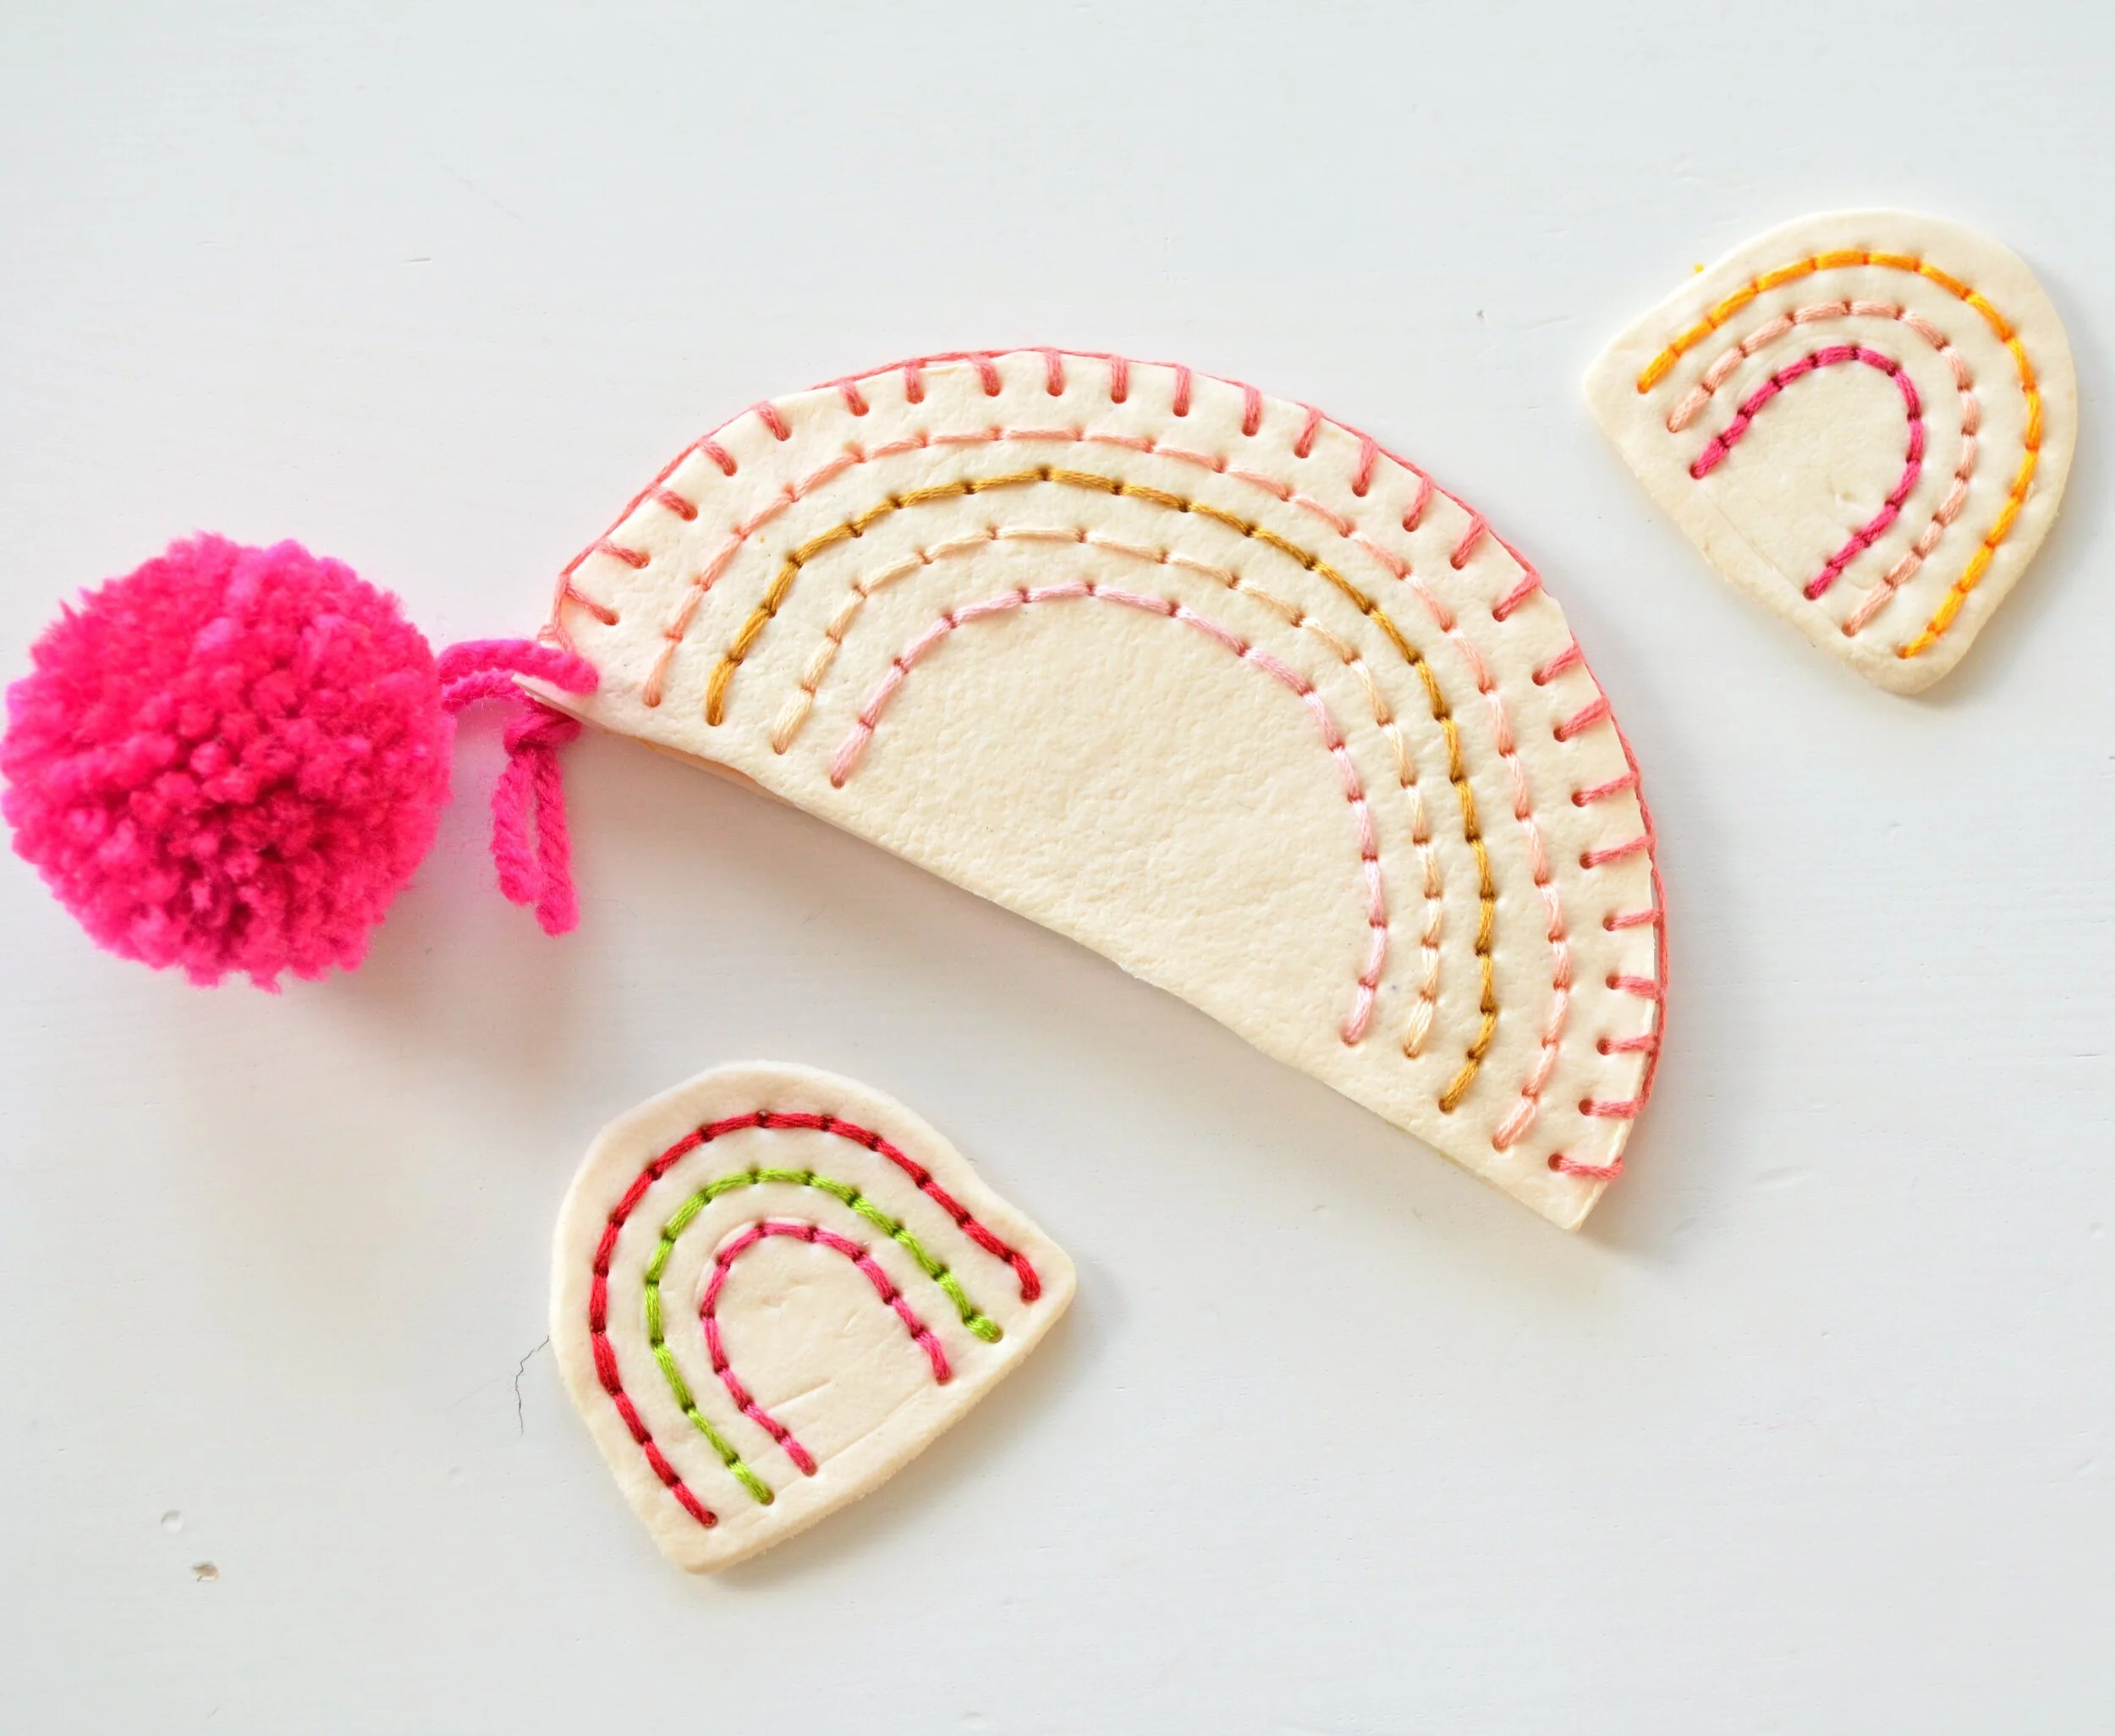
Begin stitching your rainbow. Knot at one end of your embroidery floss, and use a backstitch technique to stitch the different arcs of your rainbow. Make sure that your knot is on the inside of each piece. Stitch both halves separately.


On the final arc of the rainbow, the last row closest to the edge, you will not backstitch. You will instead stitch the two halves together with a blanket stitch. This stitch makes a pretty edge to your rainbow. If you are unfamiliar with this stitch, you can find many tutorials on YouTube. Make sure that the insides are facing each other as you begin your blanket stitch. At the end of the stitching, knot your floss and secure it inside of your pouch with a small dab of glue.
If you don’t like to see your stitching on the inside of your pouch, you can glue some felt or fabric to the inside of the clay pieces. I left mine uncovered on the inside because I don’t mind seeing the stitching.

I used a small piece of velcro I had to close up the pouch. I applied a small dab of Gorilla Glue to each side and glued my velcro to the clay pieces. You could use a snap to secure as well. I just didn’t want to have to pull too hard to open the pouch.
Attach a pom pom or any other embellishments to the outside of your rainbow. I used a piece of yarn to string through one of the holes in the clay to attach a pom pom.
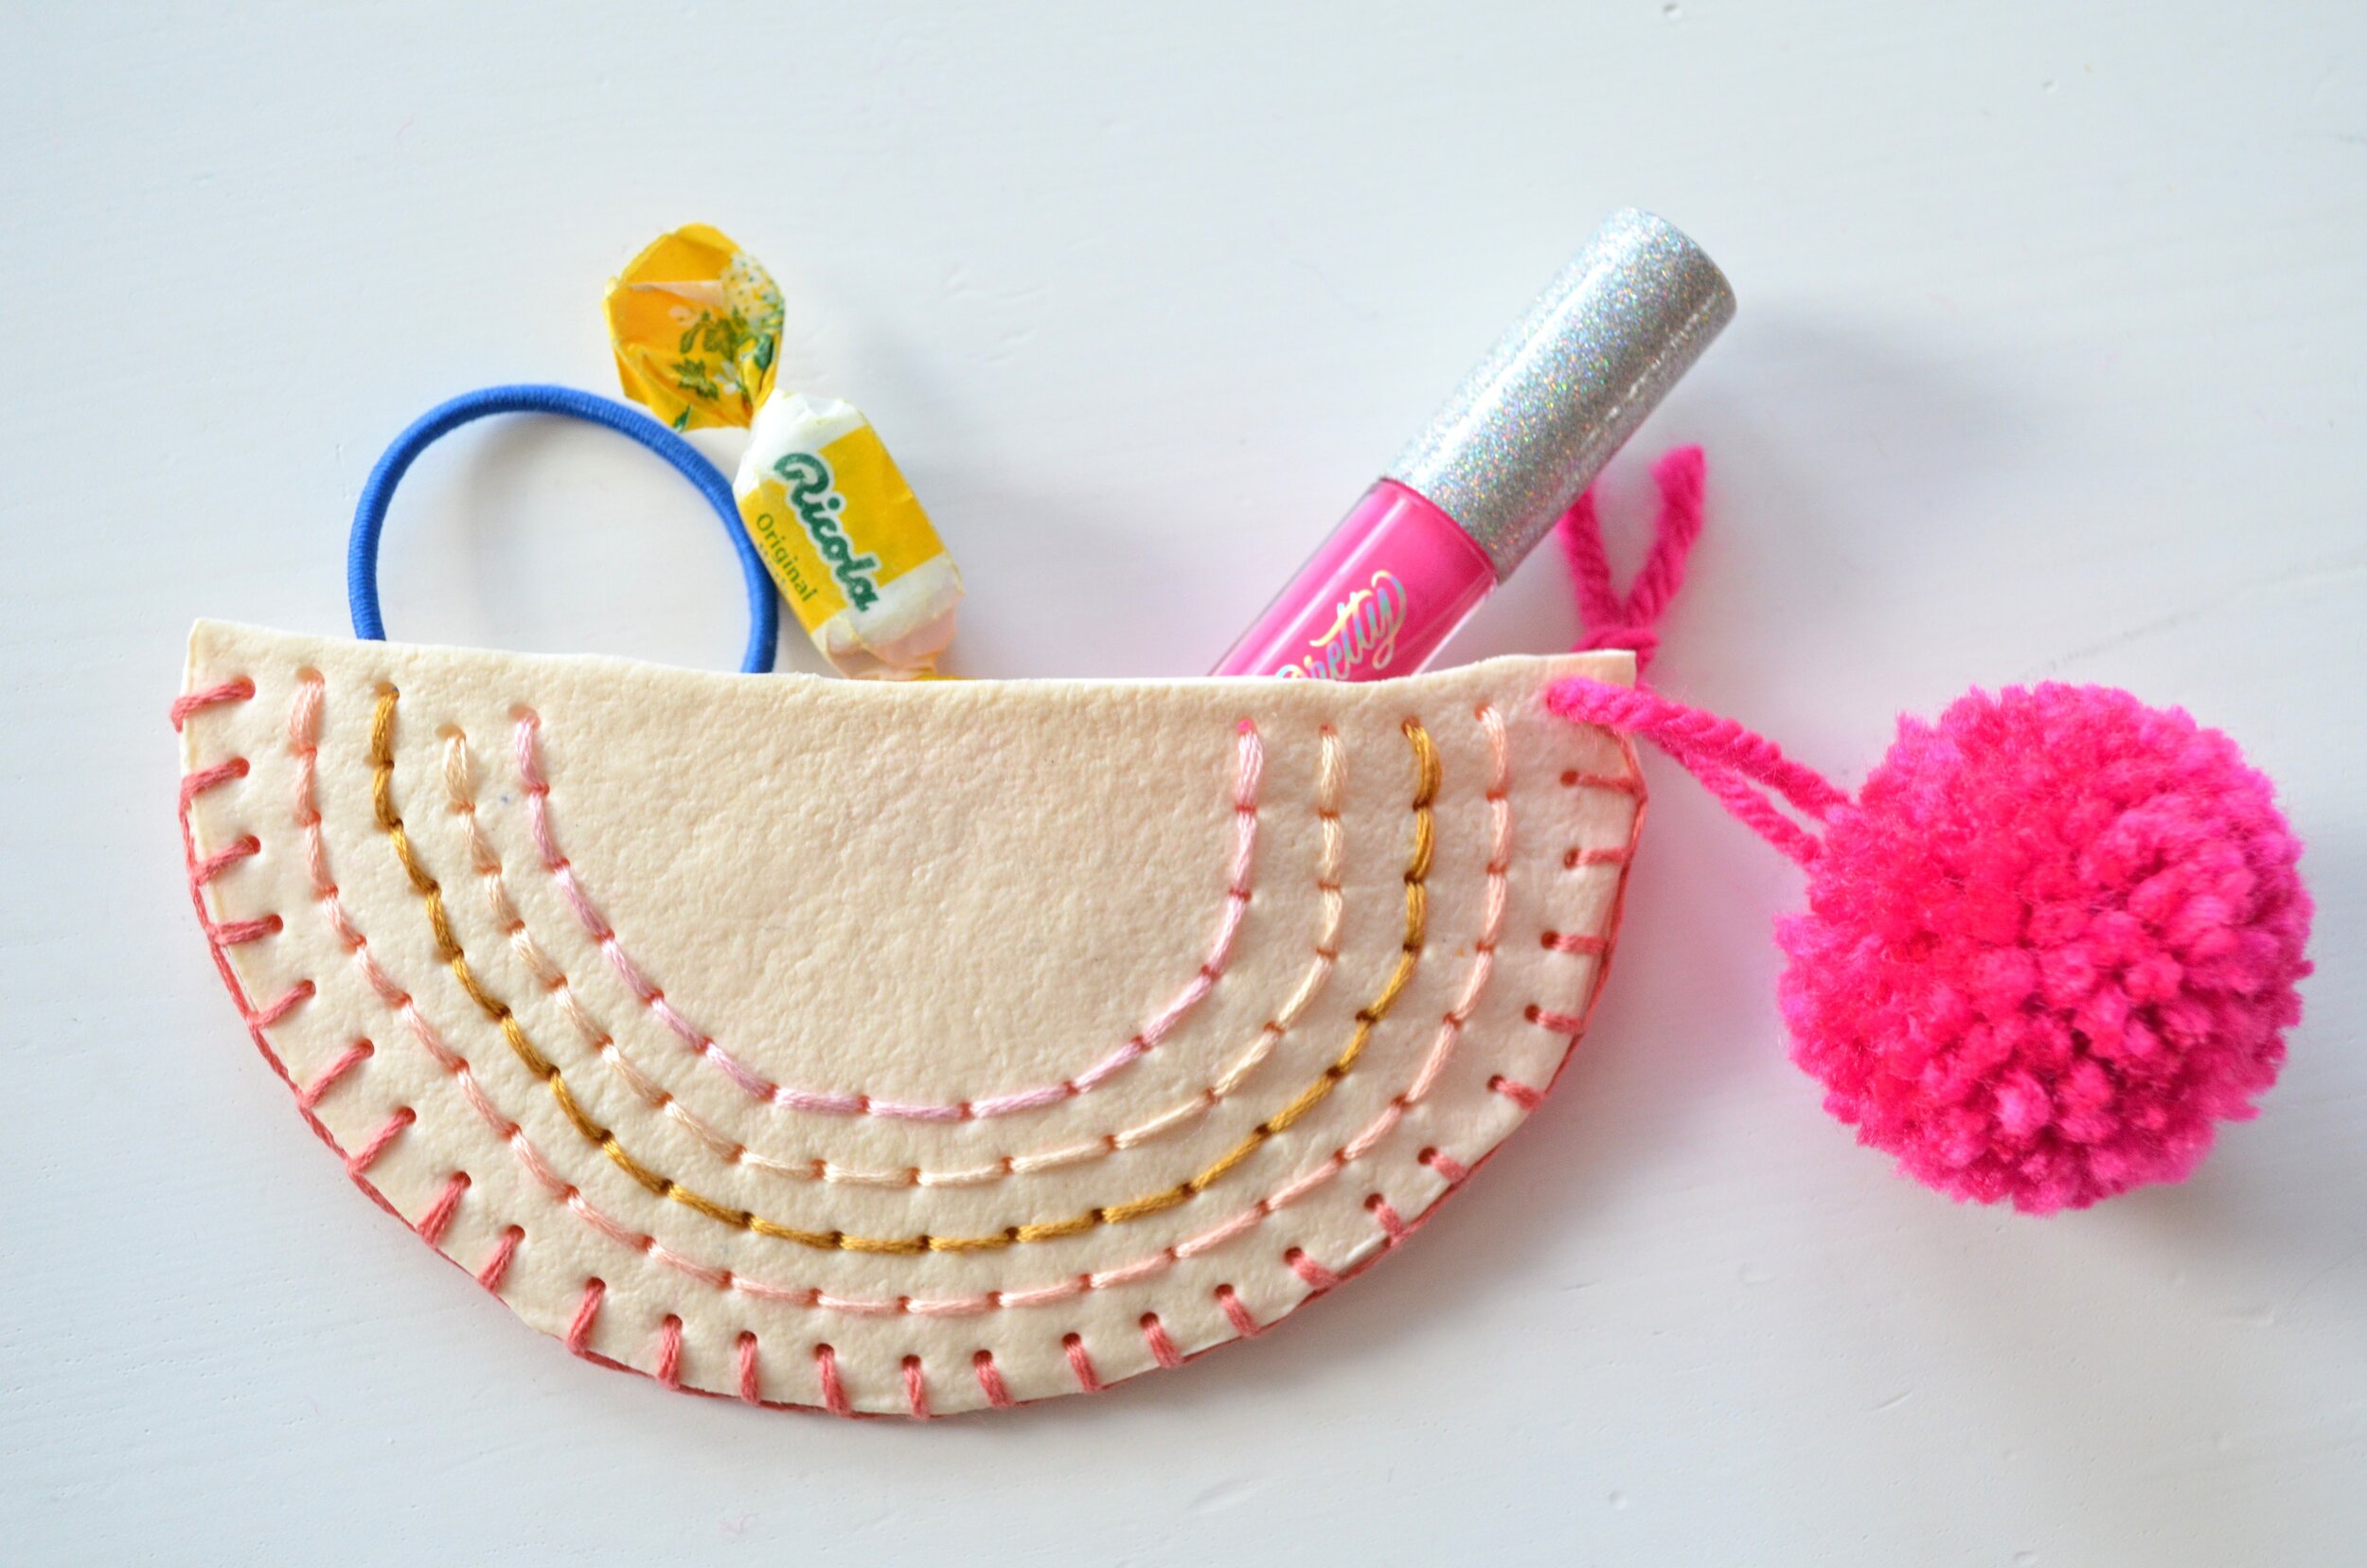
And now you have a fun little rainbow pouch! You can pack a gift card for a birthday gift inside, or store a few hair elastics to keep in your purse! Depending on how much flexibility you have in your clay, you can use it to store some small lipgloss and gum!
If making a pouch isn’t your thing, you can use this same technique to make small rainbows out of the Leather Effect Clay as well! I made a few tiny rainbows that I am going to make into hair clips for my girls! I love that I can stitch into this clay like I would with a plastic canvas! There are so many possibilities!