
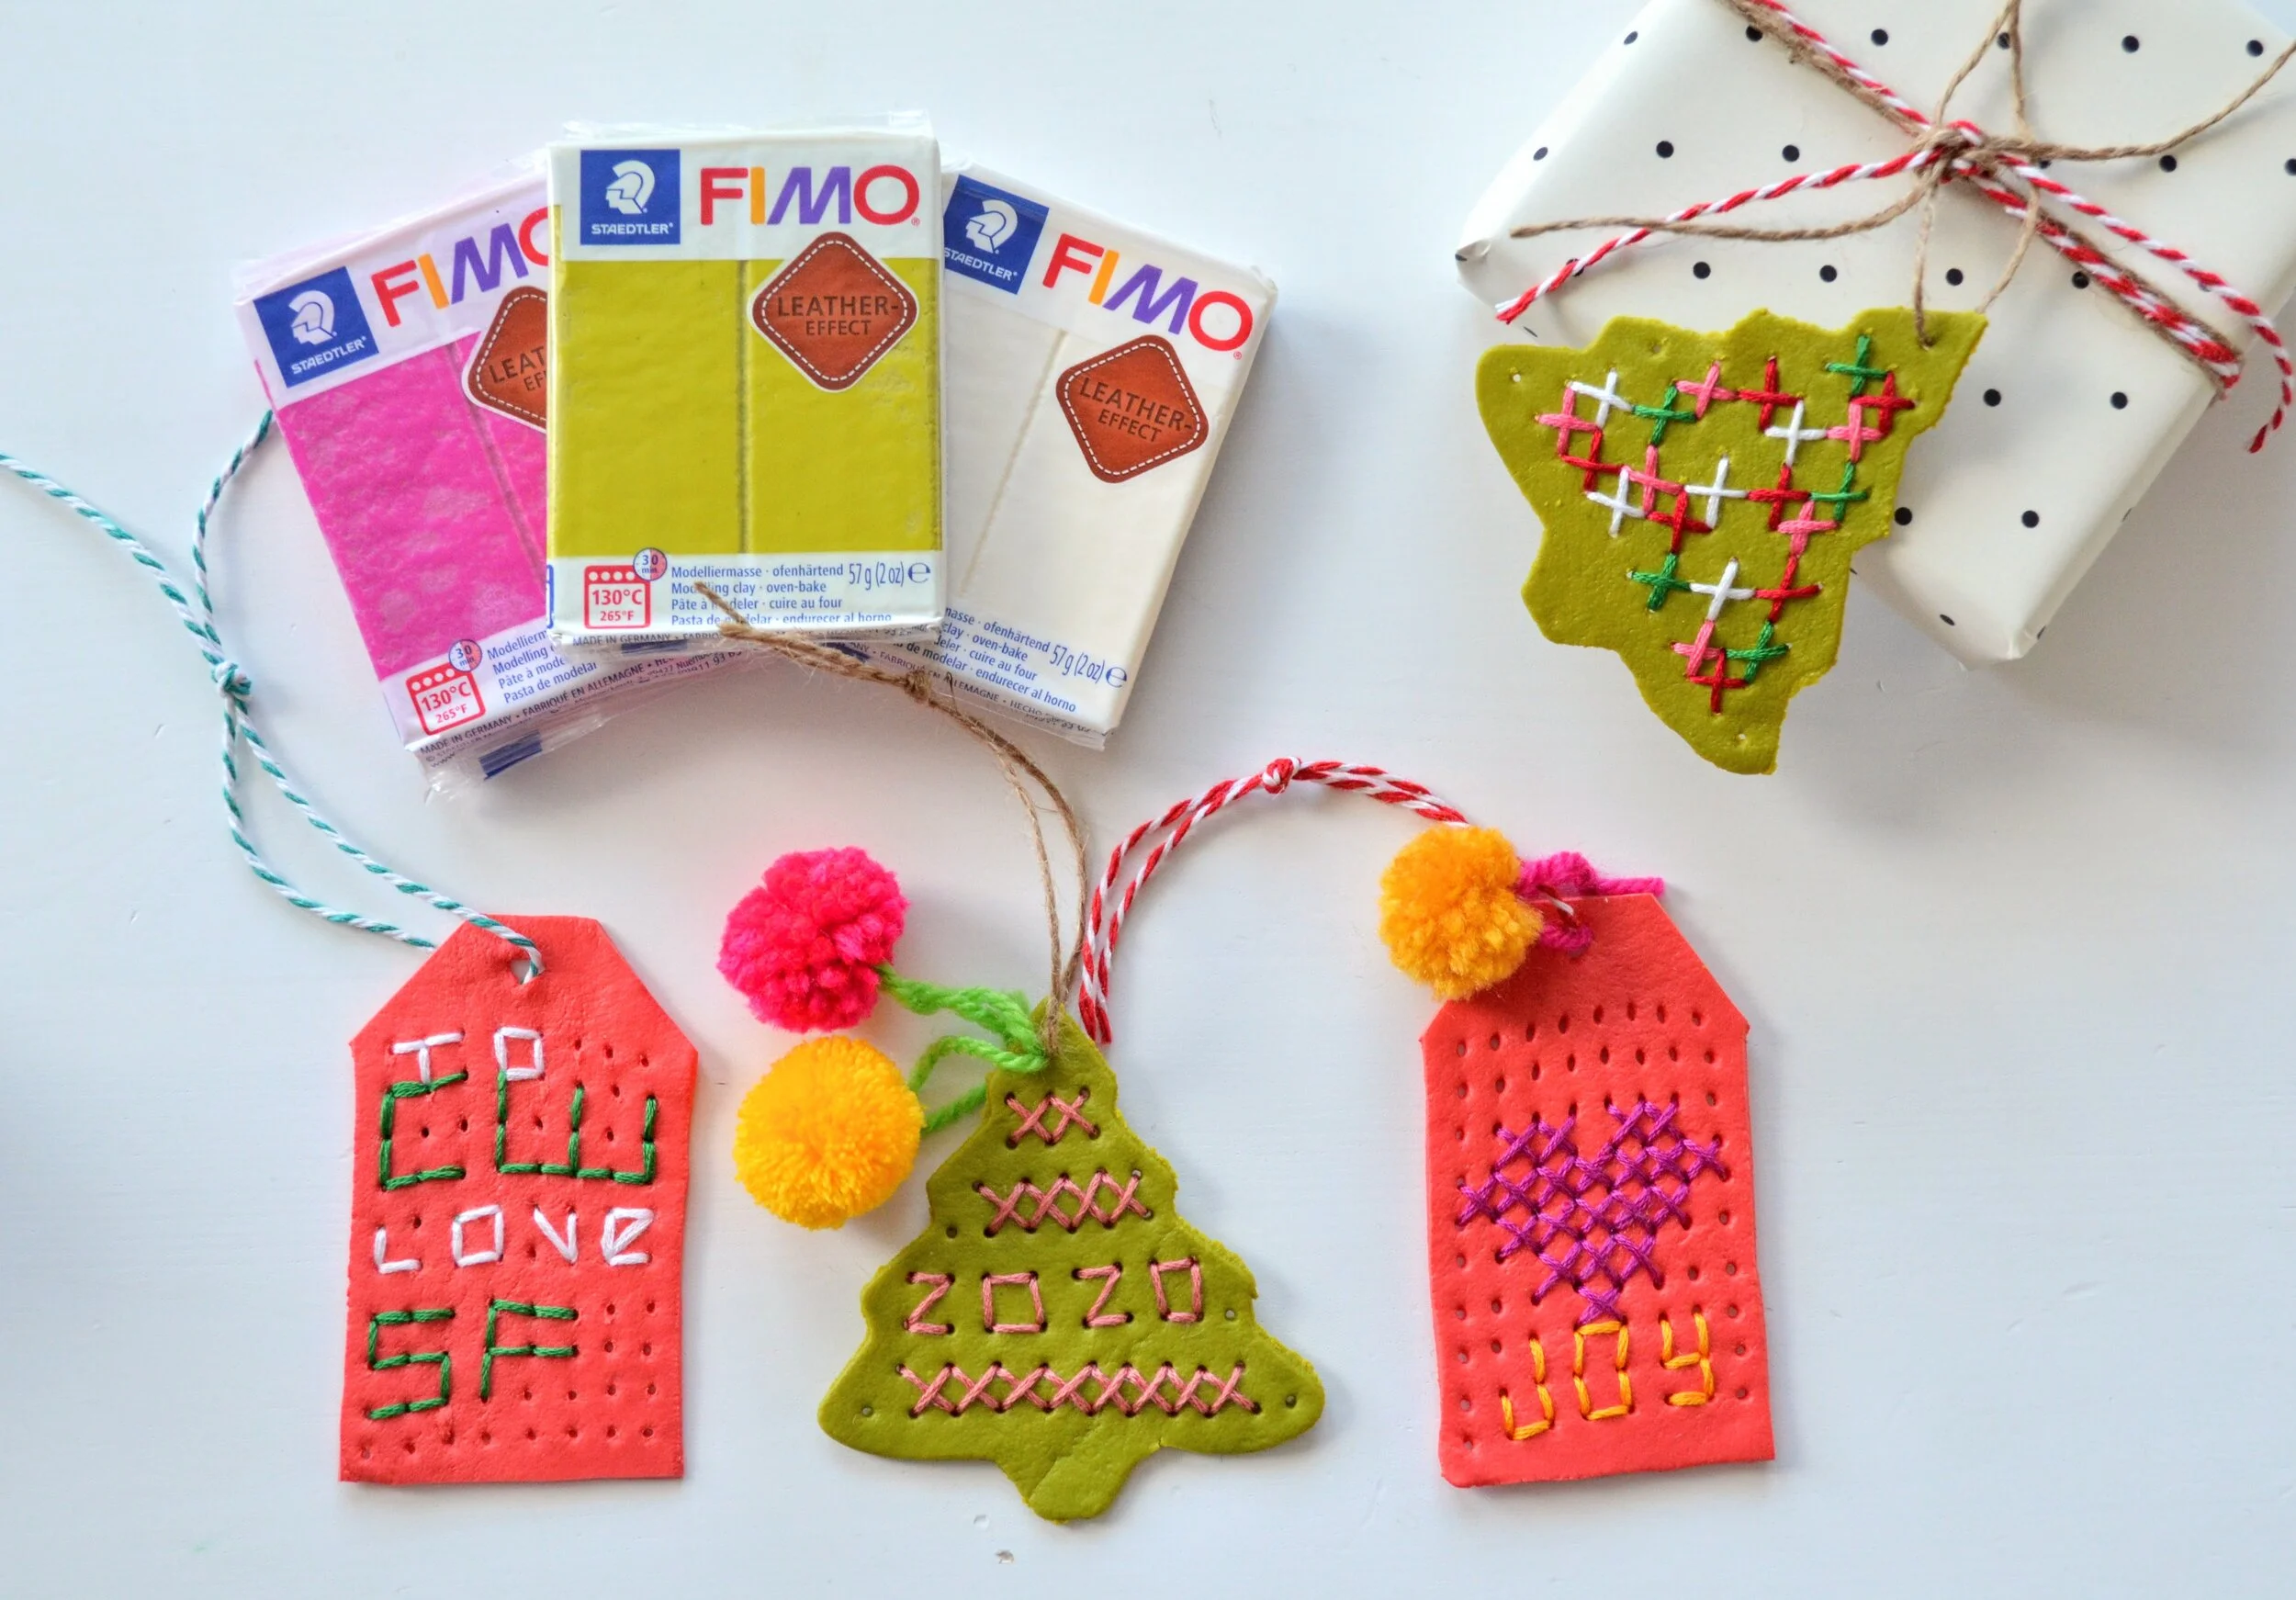
Christmas Tags and Ornaments with FIMO Leather Effect Clay
It is no secret that my kids and I love using FIMO clay in our crafting. Many of our summer craft camps involve this clay, as my kids never tire of making jewelry, home decor, and little trinkets out of the fun colors. I was super excited when my friends at Staedtler North America reached out about one of their newest FIMO lines: the Leather Effect. Let me tell you. It is amazing!
This clay is similar to traditional FIMO clay, but instead of hardening completely in the oven, it maintains some flexibility. It really is like working with leather once hardened! It can be stitched, sewn, and folded. But unlike leather, it can keep its form and firmness. I always love items that I can stitch on, so I made a few Christmas ornaments and gift tags for the upcoming holidays. It’s really easy to work with and gives fabulous results!

Materials
Leather Effect FIMO clay by Staedtler. You can find it at any craft store including Michael’s or Joann’s.
Rolling pin. I used a clear acrylic one like these from Amazon.
Cookie Cutter. You can also free hand your design. A cookie cutter just helps a little.
Embroidery floss from any craft store.
Needle

Begin by rolling out your clay. Soften it up in your hands a bit first, then roll out. If you have a pasta maker or clay roller, that can really help to get the clay thin. I didn’t want my clay to be too thin since I wanted it to hold its shape. I rolled by hand, then used the cookie cutter to cut out some Christmas tree shapes. I free handed the gift tag shapes.
TIP: With this clay, if you stretch it a bit by hand before cutting, it will give the clay an even more leather-like texture.

If your clay is thin enough, you could stitch through it after it has been baked, but with my trees, I wanted to make the holes for stitching before baking. I used the flat side of a bead needle to make the holes. You can print out a grid to place over your shape to make sure that your holes are evenly spaced. I free-handed these as well, making them a little more handmade.
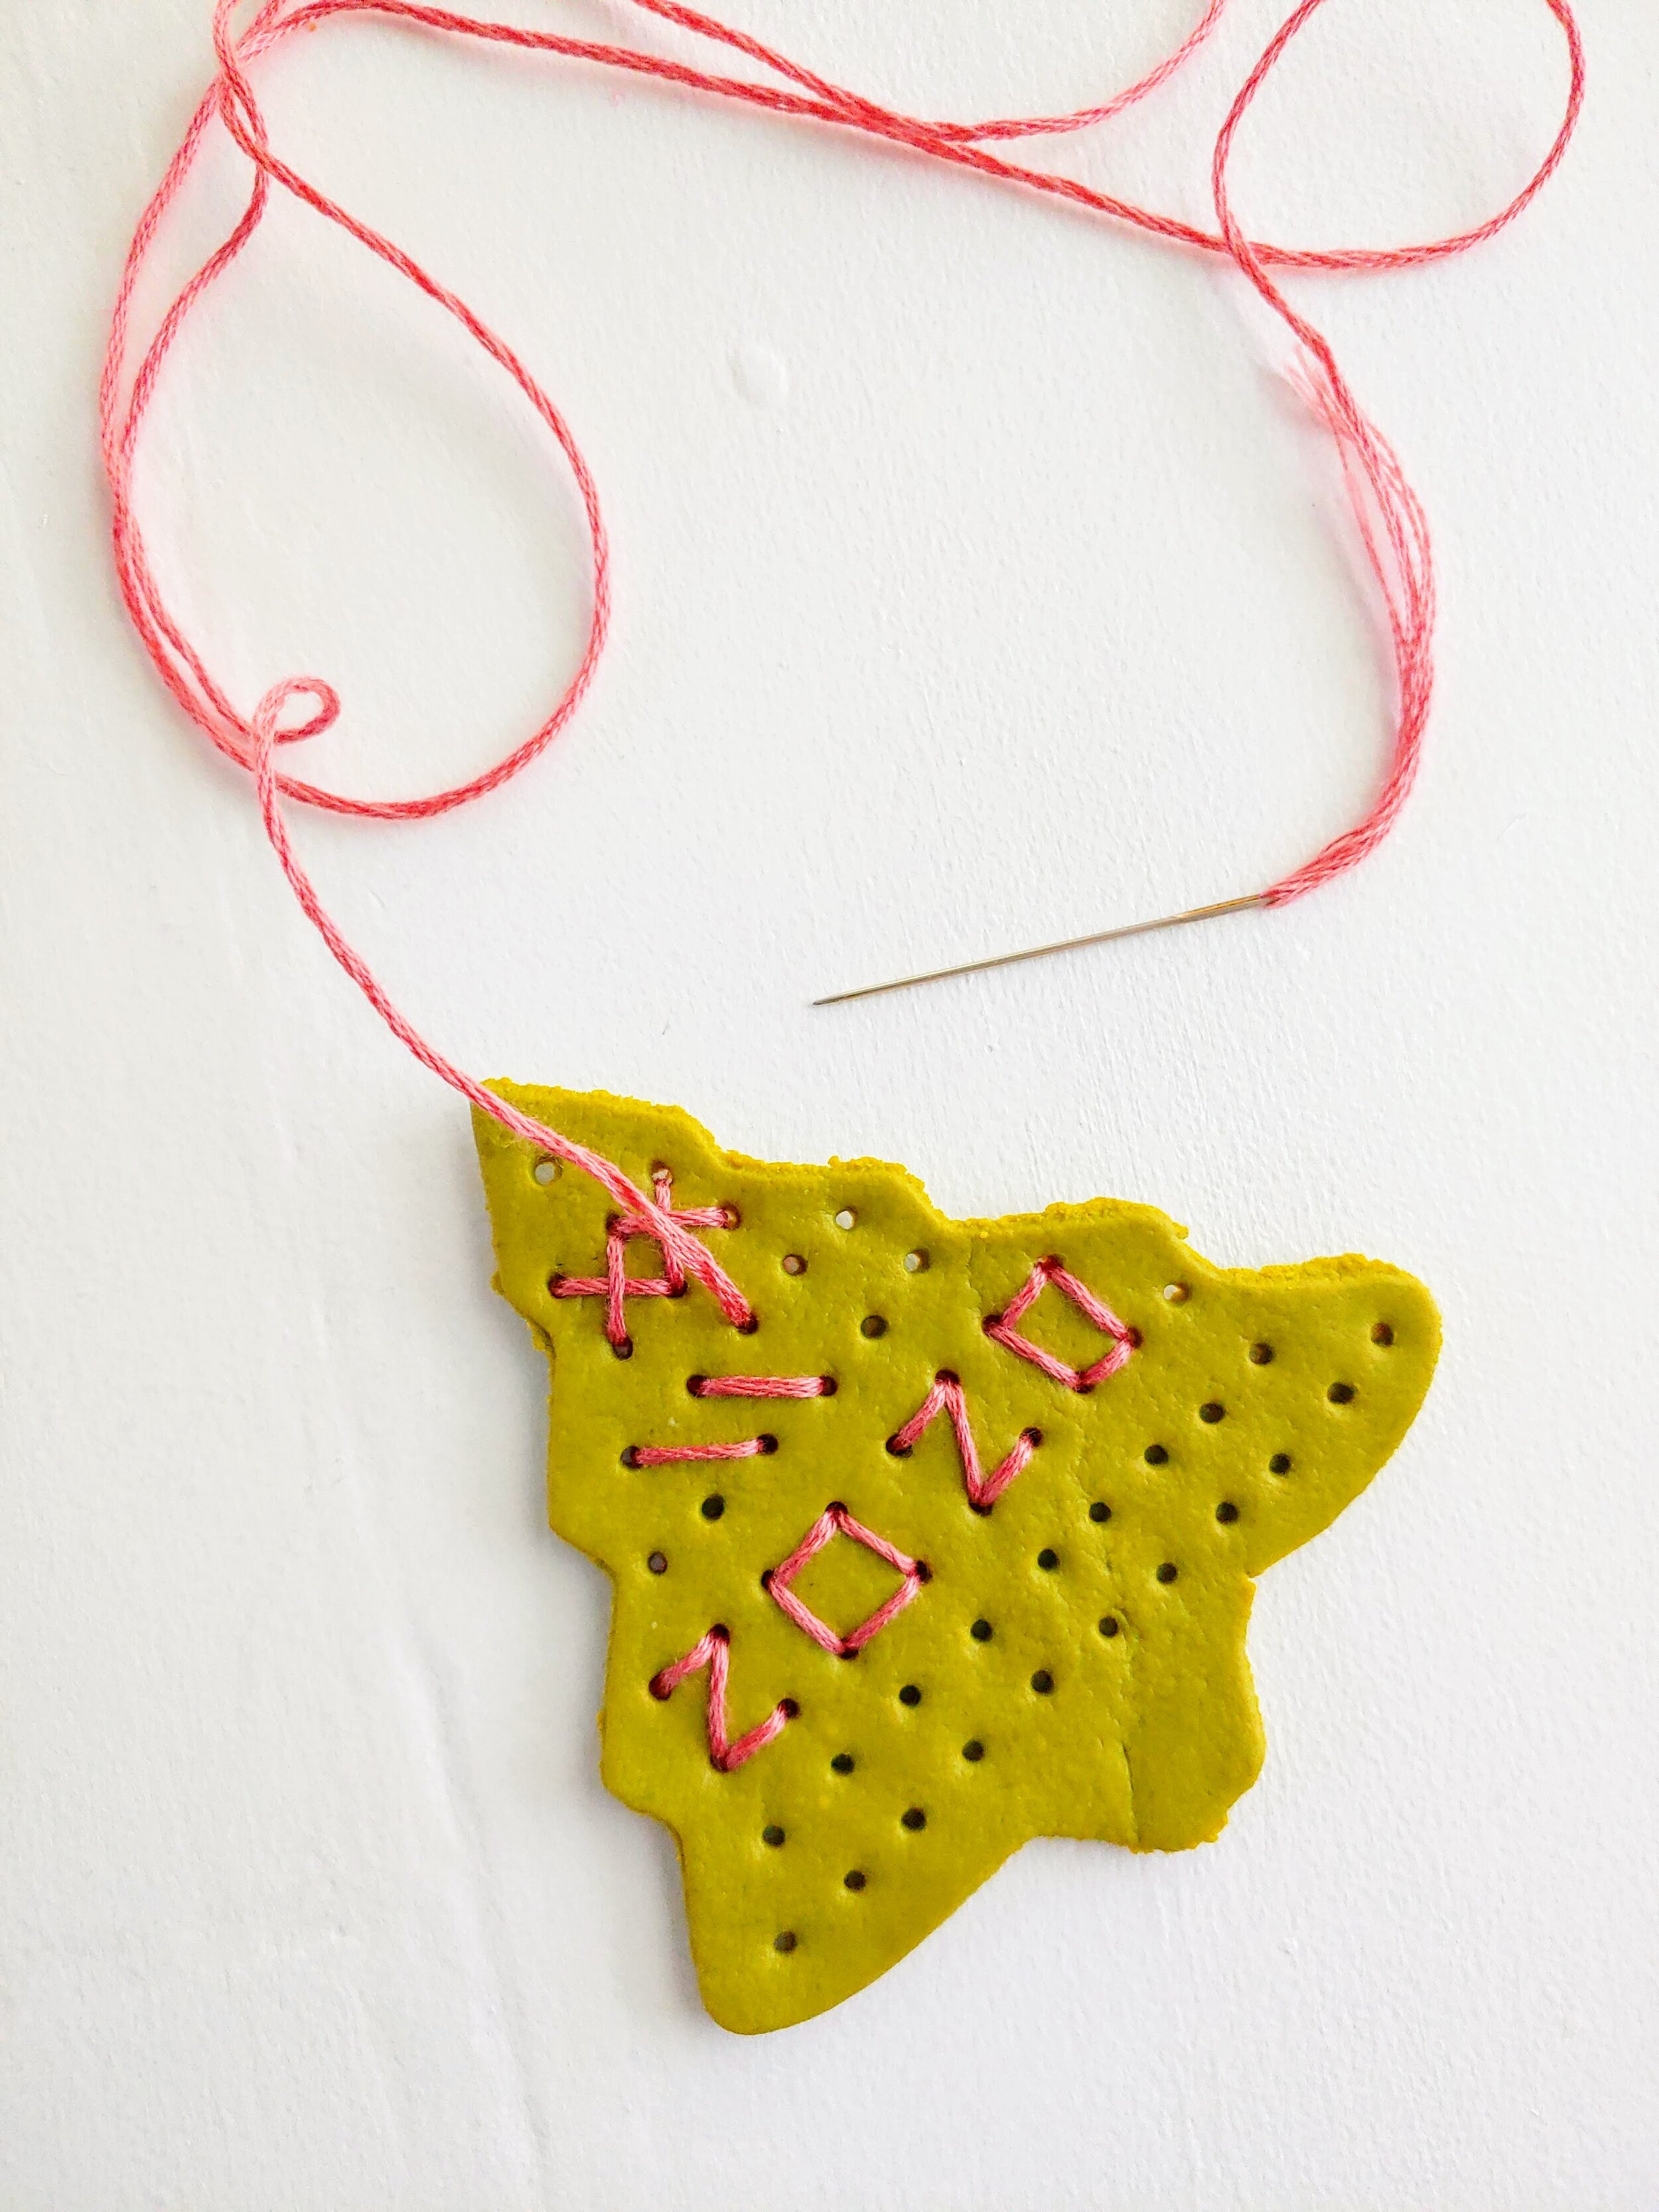
Bake at 265 degrees for 30 minutes. Once cool, you can begin stitching! Using traditional cross stitch or embroidery stitches, make a design on your ornaments or gift tags. I used all six strands of embroidery floss to make sure that it popped. You can use just a basic embroidery needle as well to stitch through your grid. Add some twine or string to the top to use it as an ornament!

These make a perfect gift topper for Christmas gifts! They can keep their cute tags and trees to always remember this Christmas! I’m excited to do more crafting with this fun new product! Keep your eyes on my website to catch more FIMO Leather Effects crafts! Thank you Staedtler North America!


