Anthropologie Inspired Felt Monogram Ornaments
While browsing through the magnificence that is Anthropologie’s holiday decor, I found the cutest monogrammed felt ornaments. Since I wanted a bunch with different letters and colors, I decided to try my hand at my own. They are very simple to make, and for about $15 you can make a bunch of monogrammed ornaments! As I have said before, I always love handmade ornaments because these are the ones that get passed down through the years. They also make a great gift topper! I love ornaments that can serve a double purpose!

Materials
Felt. Choose any color. I just went with the standard felt from the craft store.
Gold embroidery floss. I also found mine at the craft store, but you can buy a six pack for about $8 from Amazon.
Fiber fill. You can also find this at any craft store or even at Walmart. You can also find an inexpensive bag from Amazon.
Large eye yarn needle. I really like this kind from Amazon. I use these allllll the time! They are good to have on hand!
Fabric Glue. Any variety should work. Amazon has several varieties like this one.
Tiny pom poms. These might be my favorite buy of the holiday season! I can’t get enough of these cute poms! I found tiny bags at Michaels, so that is definitely an option, but I ended up buying this bag from Amazon because it came with a ton!
Glitter or sequins. I picked star shaped golf and iridescent glitter from Hobby Lobby. You could use sequins if you prefer or even tiny gold beads. You do want these to be fairly small so that they don’t take over your letters.
Marker for marking your letters prior to cutting. Try to pick one that isn’t too dark or that will bleed through.
Letter stencils or templates. I used my Cricut to cut letters to the size I wanted then used those for tracing. You could even do this free hand.
Scissors.

How To
Begin by tracing a letter onto your felt. You will need two halves, so I like to trace one side, then flip it over to trace the mirror image. That way, the two sides with marker can fit together on the inside and not be seen.

After cutting out both halves of your letter, put the two sides with marker together on the inside. Using two strands of gold floss, knot the end, and insert through the inside of one piece of felt. This will help hide your knot. Begin stitching around the letter using a blanket stitch, or any stitch you feel comfortable with.

Since we will be stuffing the letters, be aware of parts of the letter that will be harder to fill if it is completely stitched. For example, this W would be hard to fill if I stitched all the way around. I decided to fill in each segment as I went along. I filled the far left side after stitching almost completely around that side. It was much easier to fill this way. Then I continued stitching around and filling the next section when it was almost all stitched. At the end, make sure the entire letter has been stuffed, then make another knot and conceal it inside the felt as much as possible.

Using the fabric glue, dab small dots around the felt and apply your glitter and pom poms. If the tip of your glue bottle is too large, you may even want to pour some glue into a dish and apply with a cotton swab or toothpick. Just make sure to get enough to hold your pom poms in place! Allow to dry completely.
Add a hanger to your monogram using yarn, twine, or ribbon. I used my large eyed needle to string the yarn through the letter, then tied off.
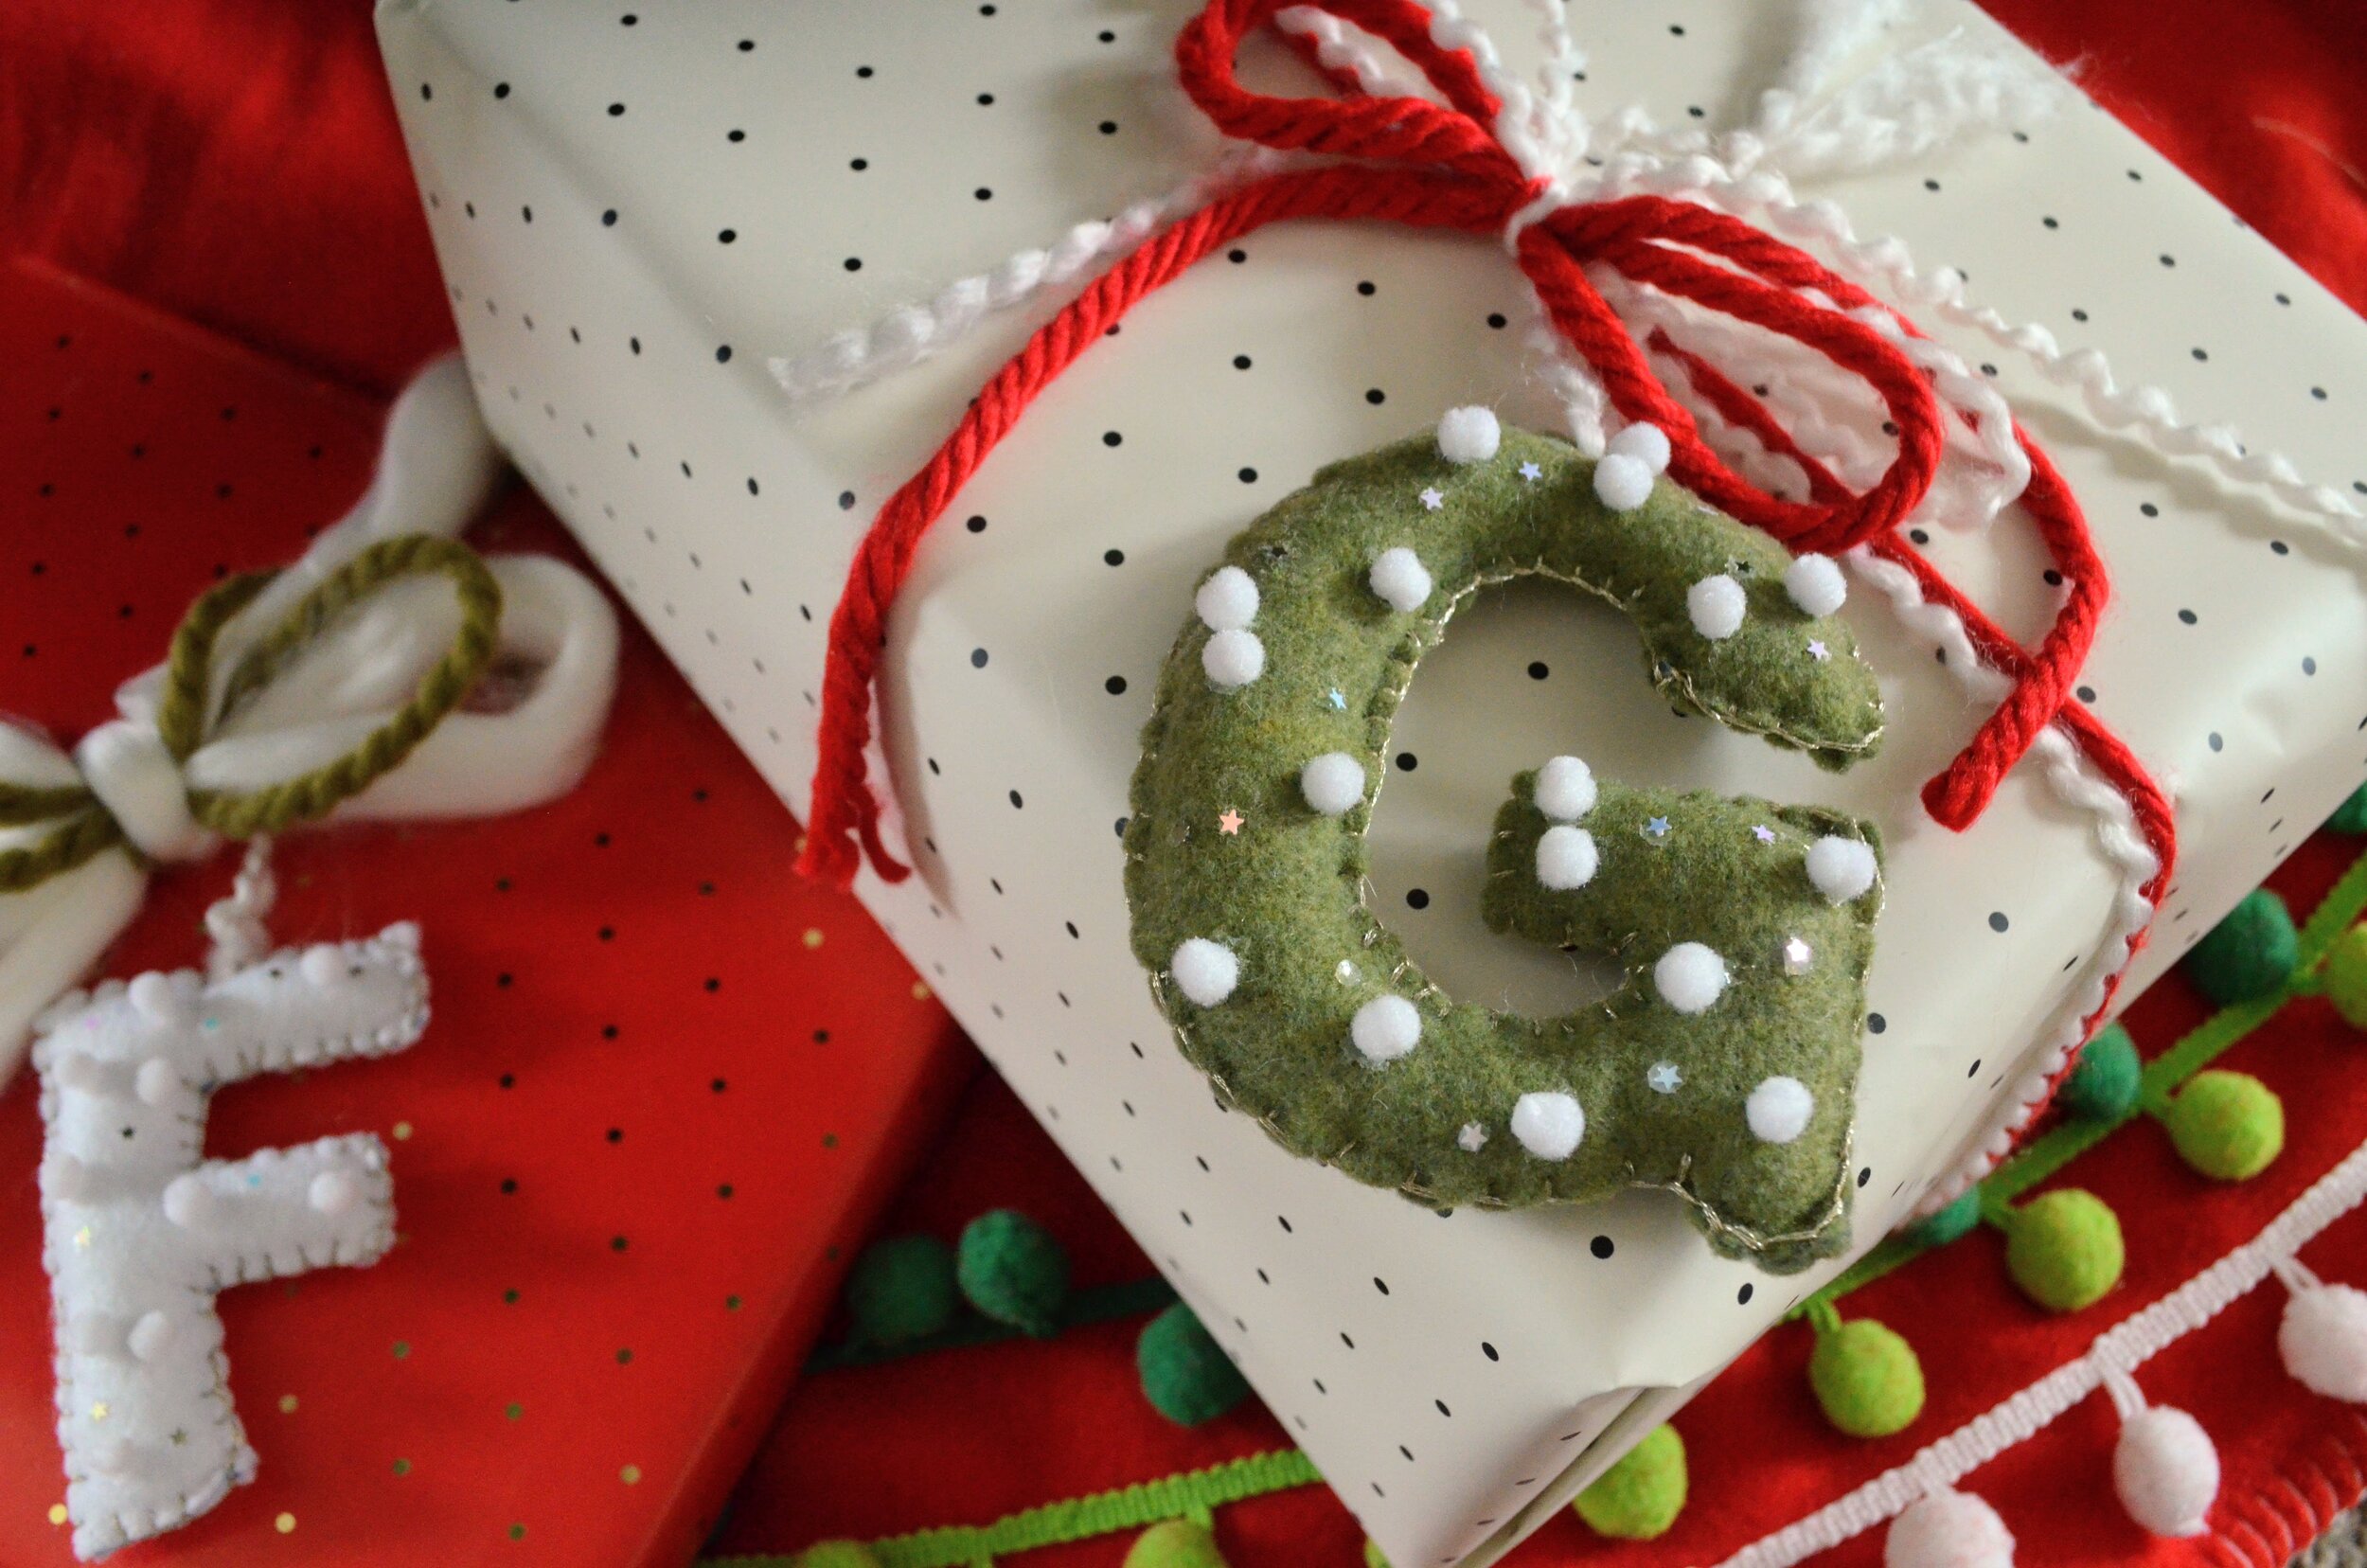
Tie to the top of a gift with yarn or ribbon, and make a one-of-a-kind gift tag and topper! The lucky recipient will also get a special heirloom to hang on their tree each year! You make need to make a few for yourself too!