

Kids Craft Camp 2019 - Week 4: Round Embroidery Hoop Weavings
I always love a craft that can use of some of my craft supply stash. If you have left over yarn from other projects, then this craft will require very little by way of supplies! For this week’s craft camp, we made round weavings using embroidery hoops and yarn. That’s really all you need! Two supplies! Wait, I lied. You need scissors too. So you actually need three supplies. :)

Supplies
Yarn. I used a variety of yarn because I love all the different textures in a weaving. I used some regular yarn, some finger loop, some roving, and other yarn I had in my stash. You will want to use a regular, thinner yarn for to string your hoop. Thinner allows for more warp threads and more design with your creation.
Embroidery hoops. If you want a variety of sizes, this 6 piece set from Amazon is a great deal. At craft stores, the smallest size is usually about $1.50, and goes up from there, so this is a great deal at about $7. If you want several all of the same size, this 12 piece set from Amazon is also a great deal. The 6” size at craft stores is usually about $1.79, so this package will save you about $7.
Scissors.
How To
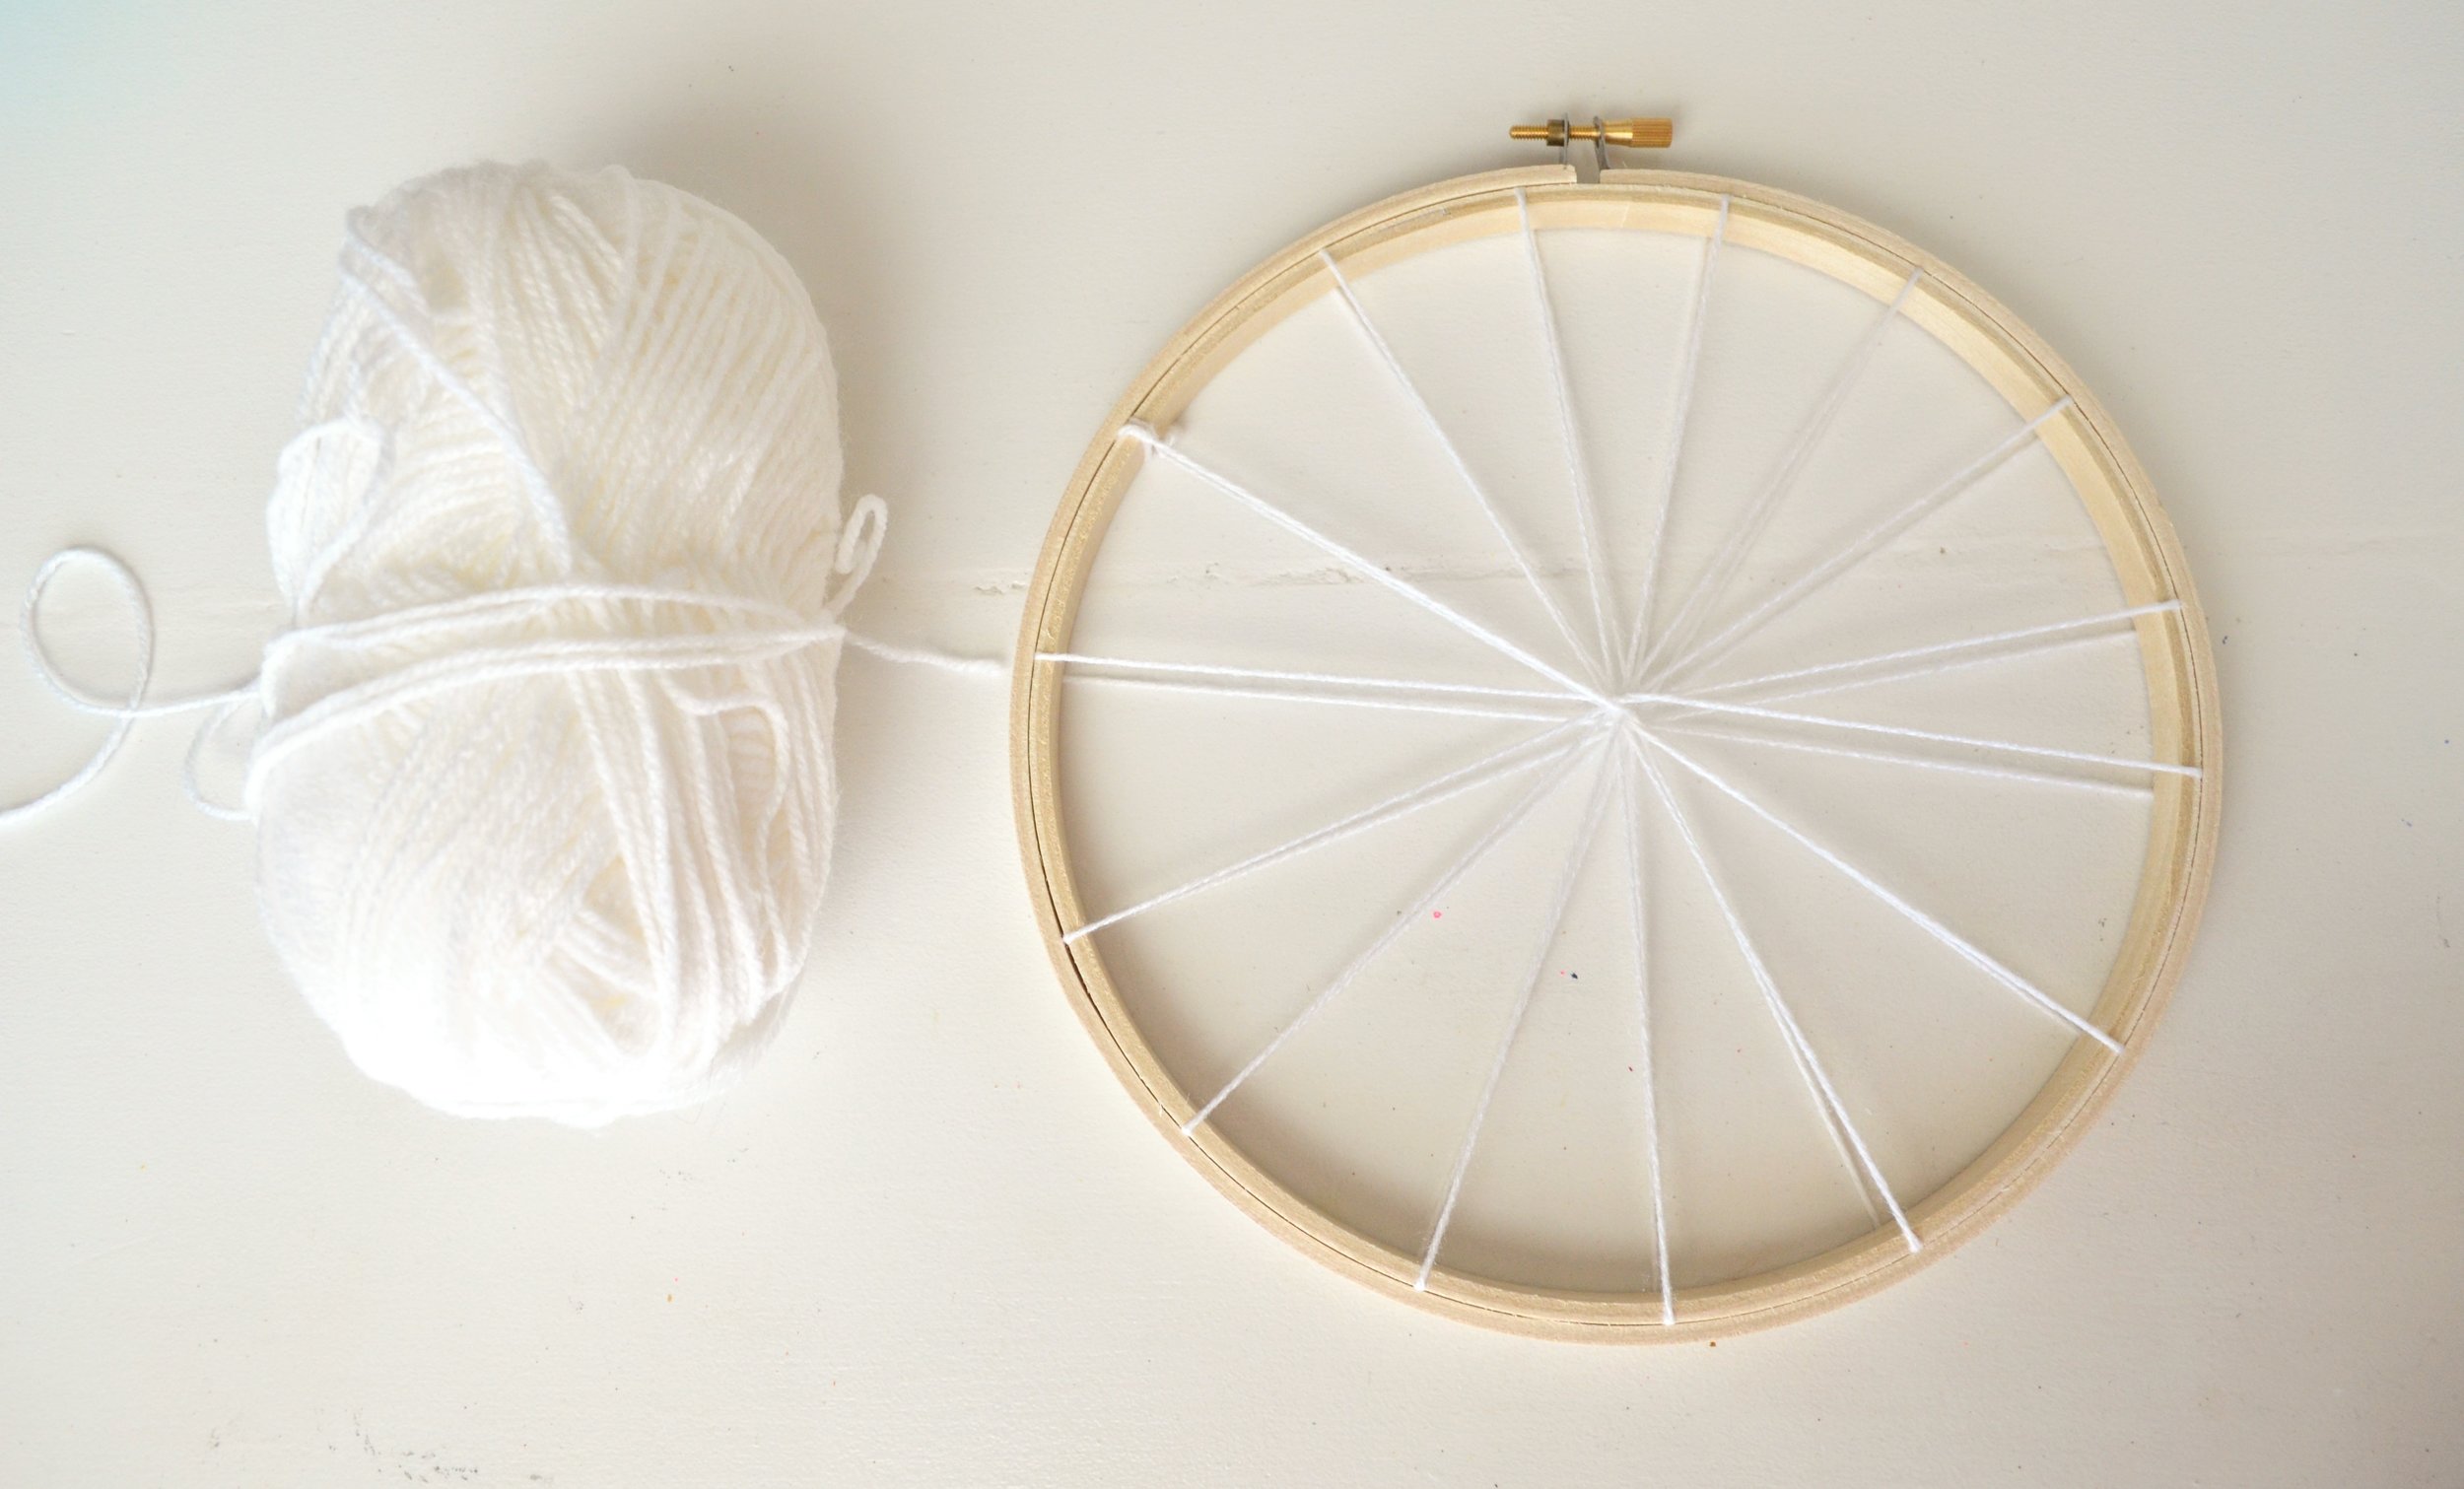
To start, you need to tie your warp (AKA the “spokes” on your hoop) yarn around your hoop. Take off the outer hoop to begin. Then tie your yarn to the hoop, and start wrapping back and forth all the way around. One really important detail with weaving is that you need to have an odd number of warp strings. So make sure that you end up with an odd number. I’ve created a video below to show how I made my strings centered and matched up.
At the end, tie another knot back at the first string to complete your weaving loom. Put the outer hoop back on to hold your warp strings in place.

I actually did this ahead of time for all of the kids. I thought it might be a little tricky for them, so I prepped the hoops for them. It really didn’t take long to do all of these. Once I got the hang of it, they went pretty quickly.

Now you can begin your weaving. You need to tie your first yarn directly onto the warp strings. The knot can be on the backside of your finished weaving, so don’t worry about it looking bad on your finished piece.
Keep in mind that it is easier to use the thinner yarn in the center of the hoop, as you have less space in between warp strings. As you get further away from the middle, larger yarn works well in filling in those larger spaces.

Start weaving your yarn over and under each warp string. Because you have odd numbers, you will be able to go around and around with your over under pattern.
I found it easiest to cut strands of yarn from the yarn skeins because it is hard to fit a large skein through the small warp openings.
As you want to change yarn, simply tie the new yarn to the end of the previous yarn. Then keep weaving as if you had one long strand. You may want to make sure that the knots you tie end up on the back side so that it keeps the front knot free.

Pull your yarn tight as you weave around and push it close to the center to make sure there aren’t any gaps.

I was surprised at how easily my kids caught on to the weaving. I did have to help the younger ones tie new yarn on to the previous yarn strand, but they didn’t need any help in weaving around.
When you get to the end of your weaving, you can tie your yarn to one of the warp strings, just like you did at the beginning.
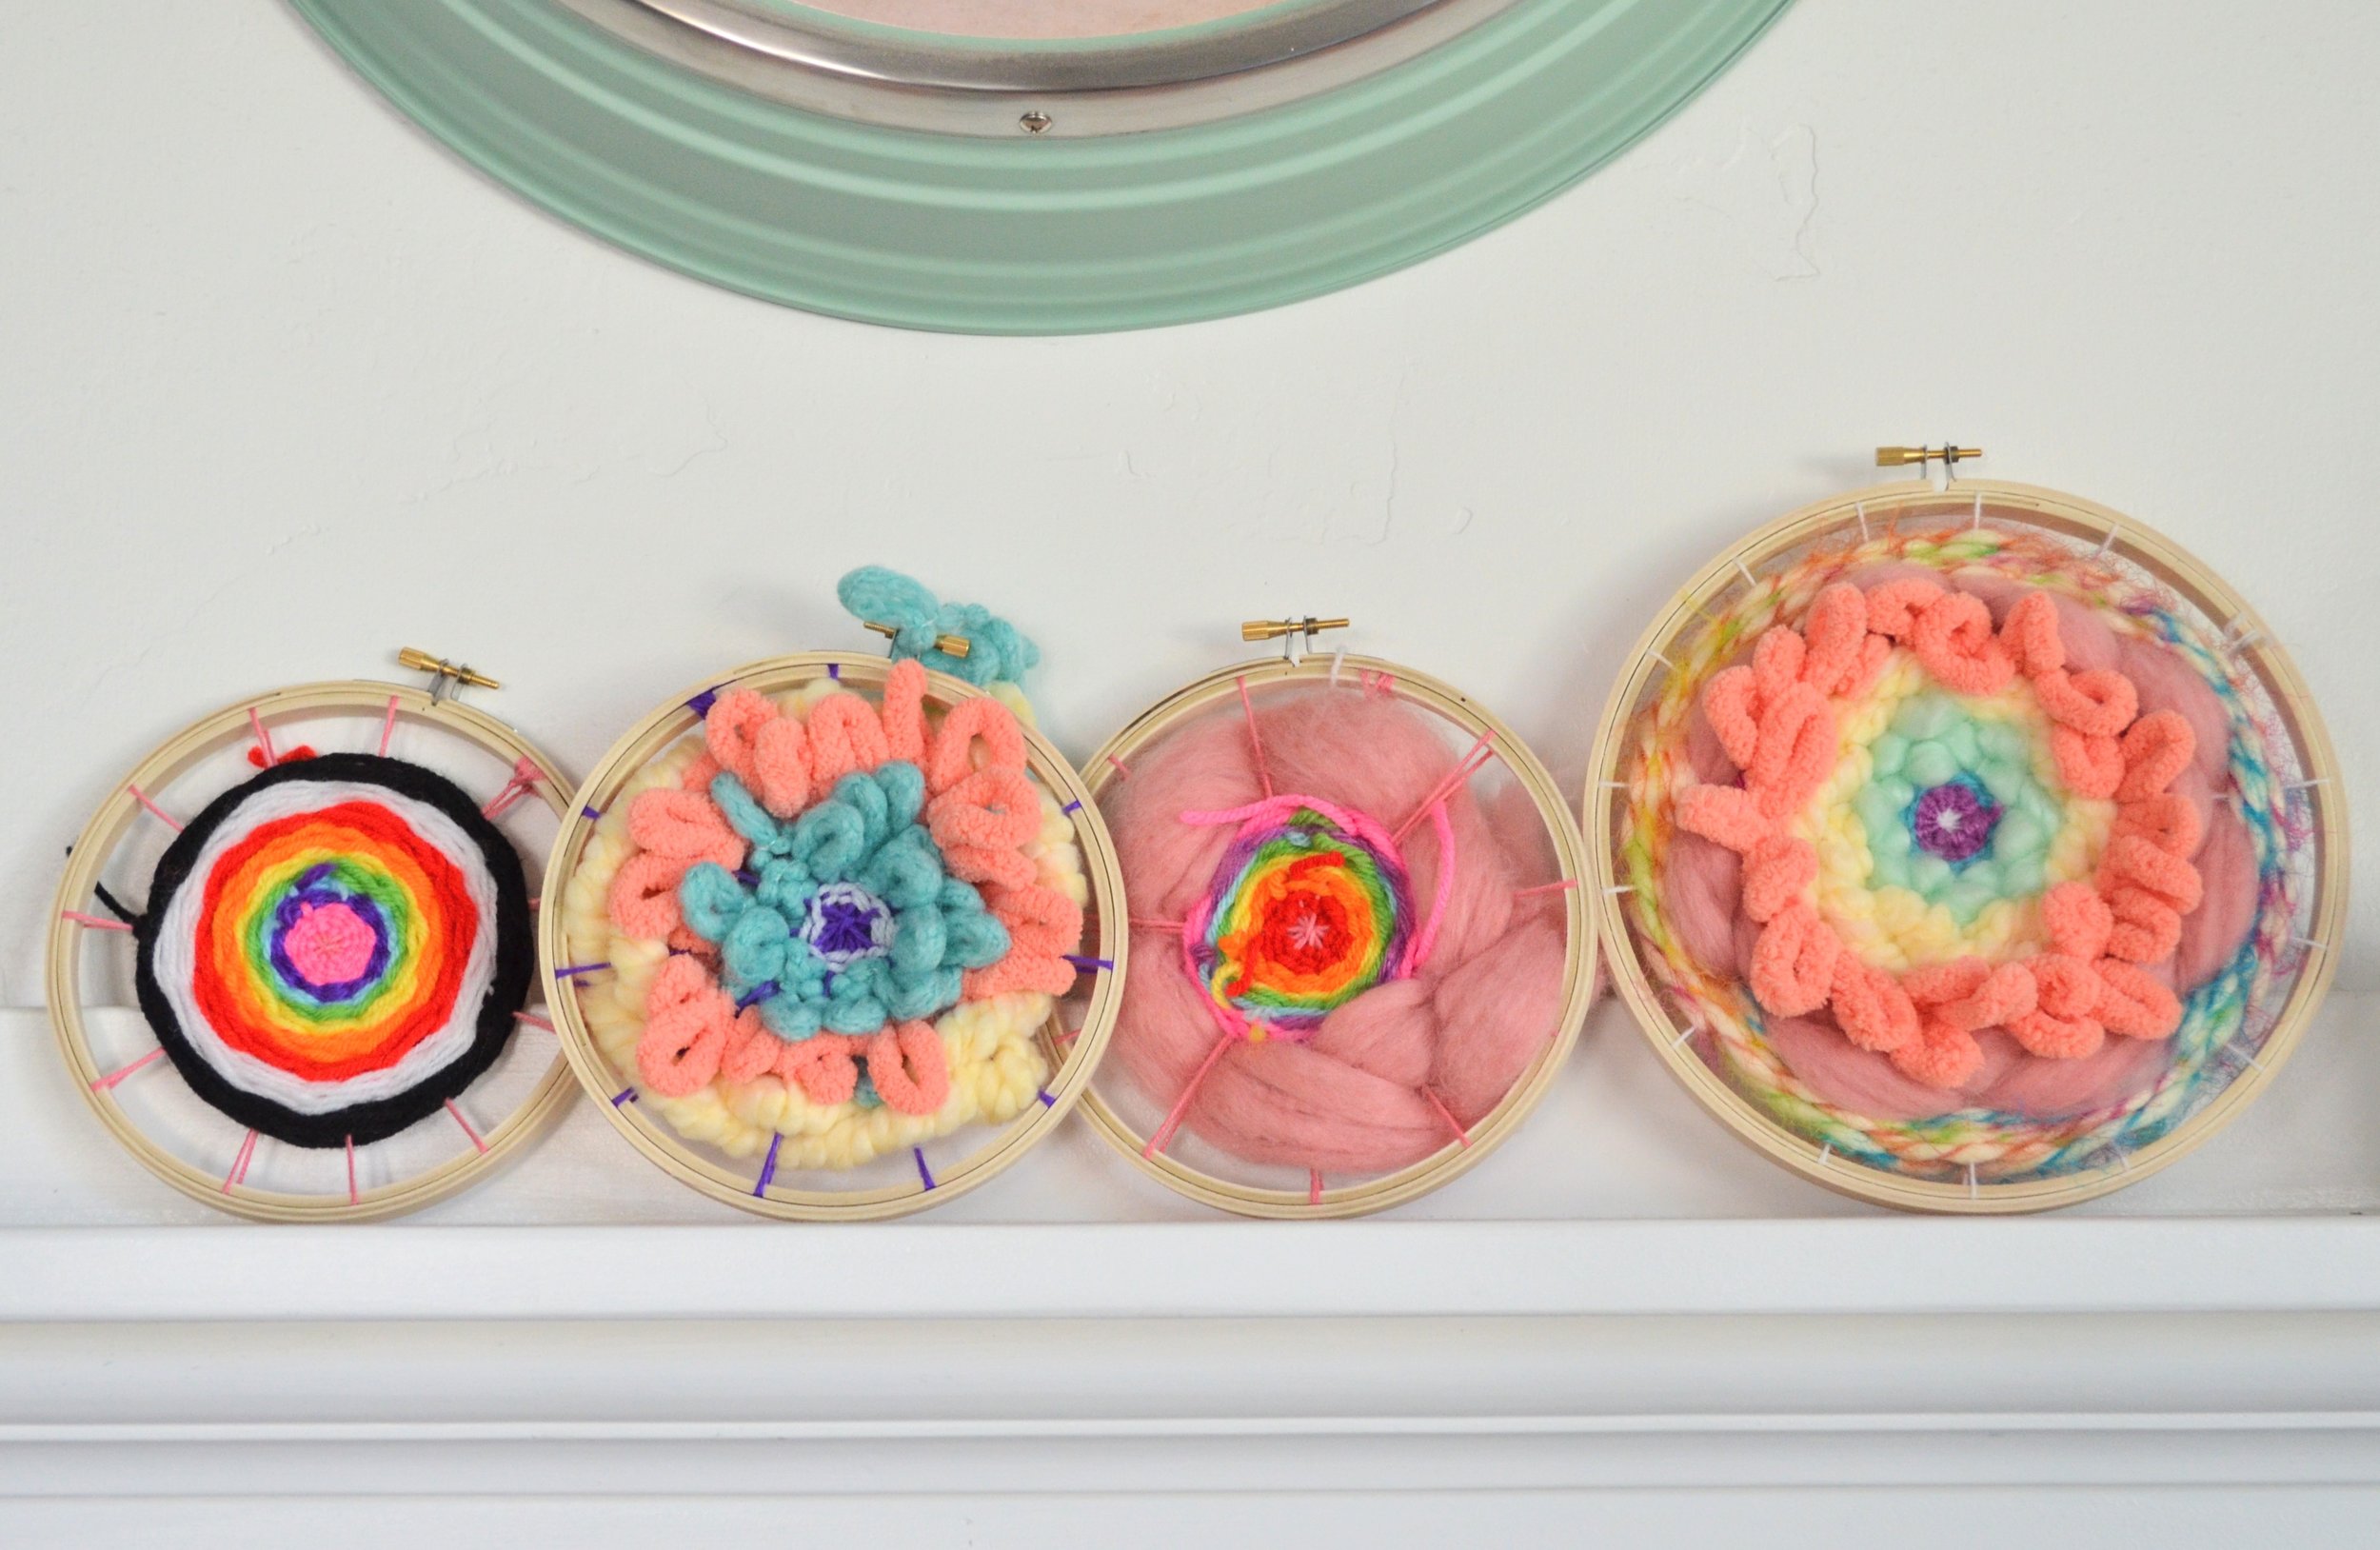
You can trim down any visible ends, and ta-da! You have a beautiful, fiber filled, work of art! These can be hung from a wall or can be displayed on a mantle or book shelf. I seriously was so pleased with how cute they all turned out! It’s fun to see the different personalities of each kid come through in the colors they choose and designs they make.

I hope you enjoy making these as much as my kids and I did! Use up those yarn scraps and make some fun, and funky art for your home!

