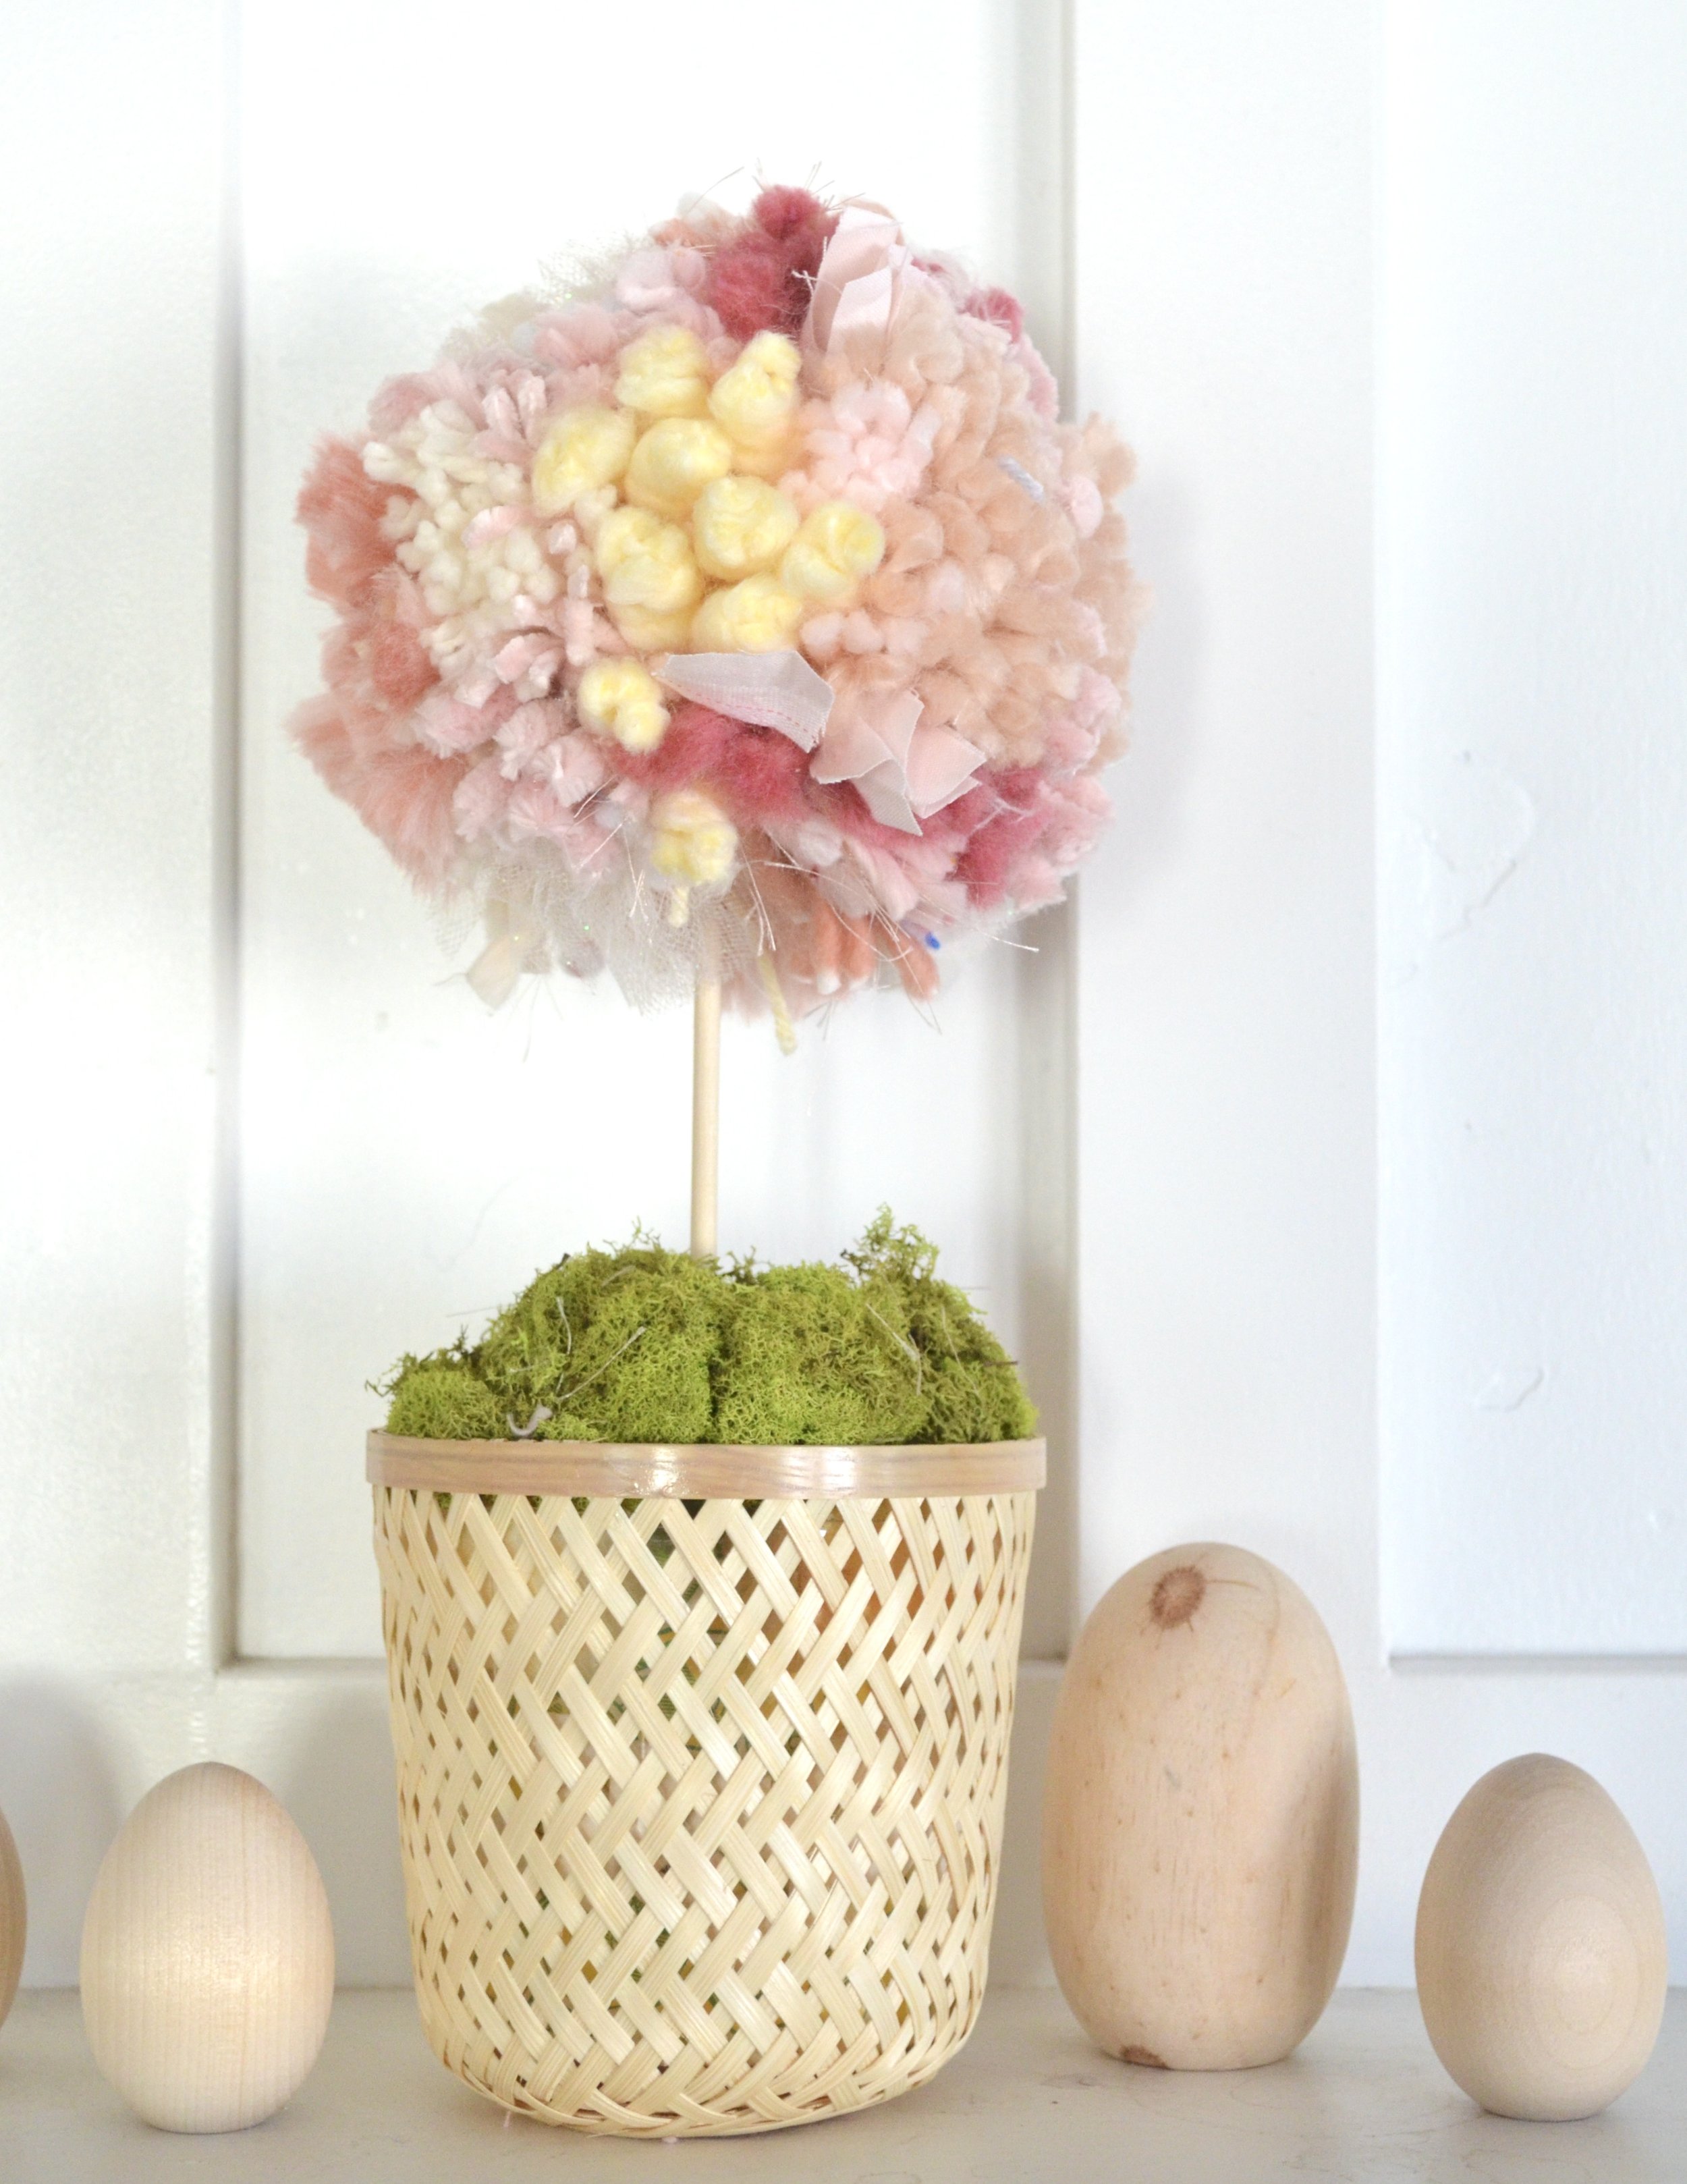
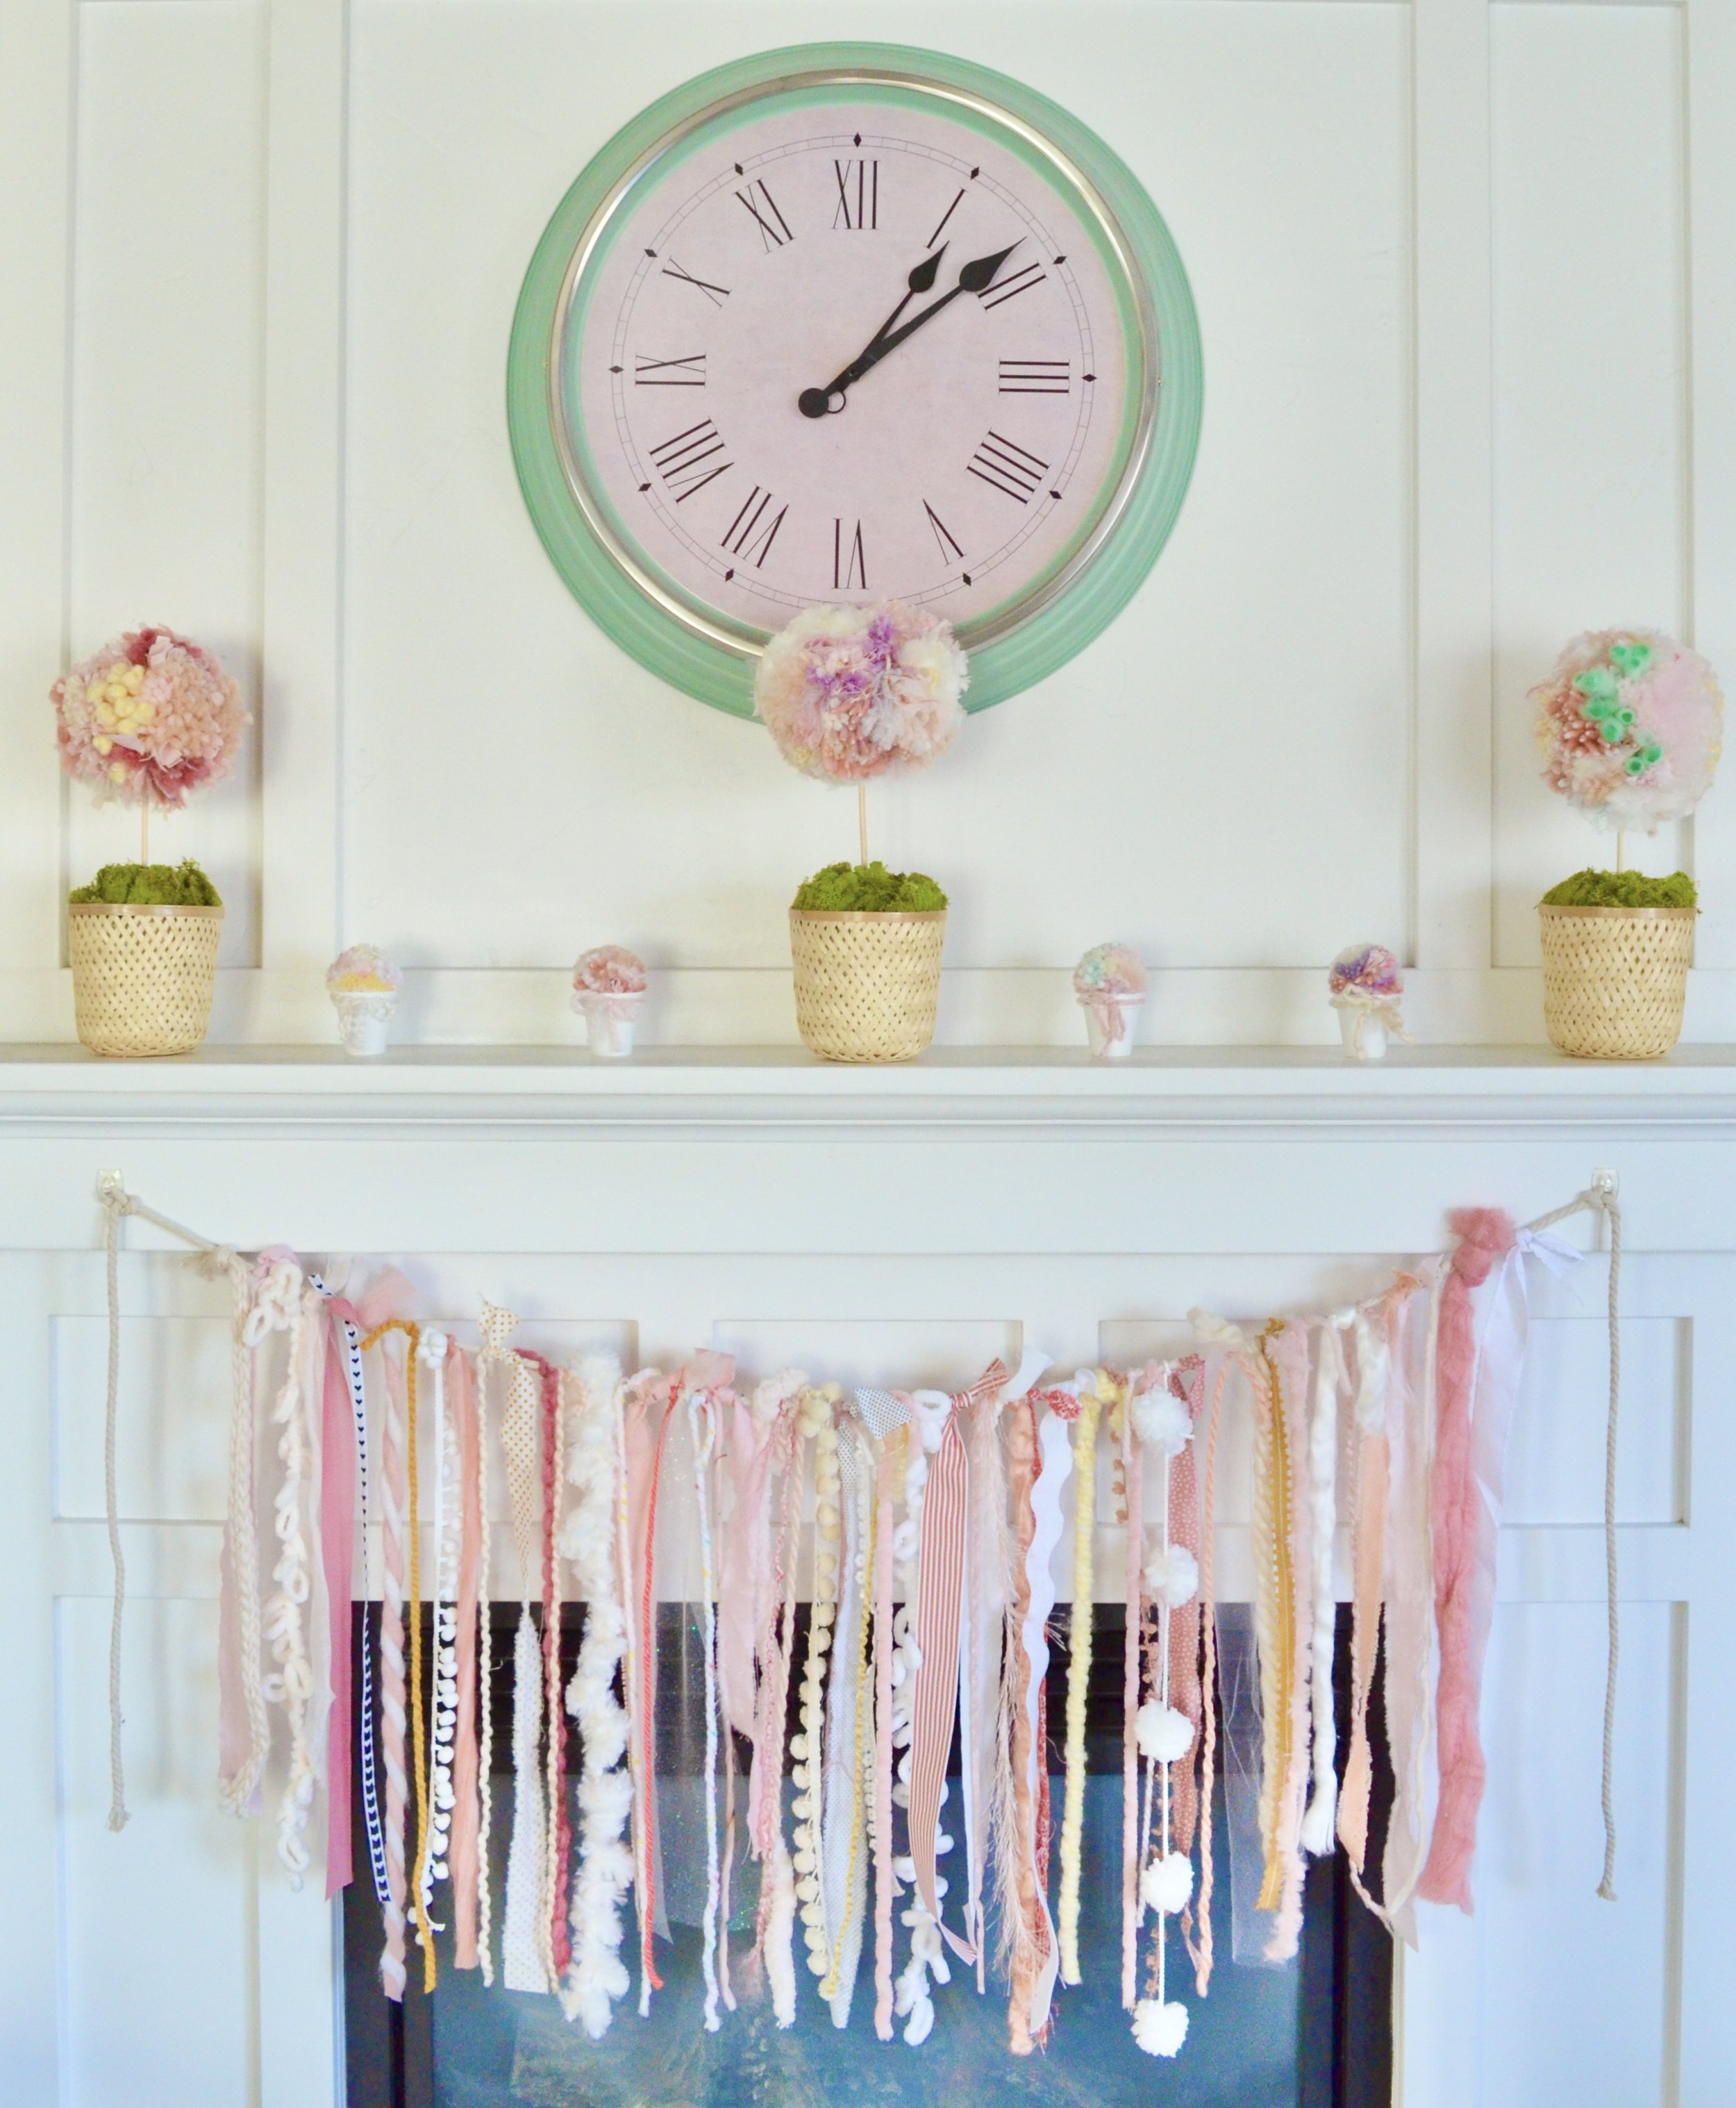
Spring Pom Pom Topiaries

When spring hits, I’m always ready to add some color back into my decor! I feel like each year after Christmas, I just want my house empty because it is so busy with all of our Christmas decor. I go very minimalistic with what I put up in January. I might add a few things for Valentine’s day, maybe a rainbow or two for March, but then after St. Patrick’s Day, I’m finally really ready to decorate again! I also usually find myself wanting something new after those cold winter months. This year, I wanted some perky pastels, but I wanted to use up bits and scraps of different fibers I already had in my stash. Enter large scrappy pom poms!

For this project, you can use up all those bits and pieces of yarn, fabric, string, ribbon, tuelle, etc. I wanted to get a lot of fun texture in my pom poms, so I mixed in a variety of yarn thicknesses. This is the perfect stash buster!
Supplies
Yarn, ribbon, fabric, tuelle, string, etc.
Large pom pom maker. I used a 6” size that I bought from Hobby Lobby once upon a time. They unfortunately don’t have it available on their website to link. I found this 4-5” one from Amazon, but you may need to buy it in a set of two. You can always make a cardboard pom pom maker by tracing a bowl (something with about a 6” diameter). Make two cardboard circles, cut a small circle in the center of each with a small gap to be able to wrap the yarn. Just google “cardboard pom pom maker” and you’ll be able to see what it should look like. Sometimes to get the larger pom poms, this is a great strategy!
Wood Dowel or stick. You need it thick enough to hold the weight of the pom pom, but not too thick as it still needs to be able to go through the center of the pom pom. I bought mine from Hobby Lobby in a multipack, but you could get one long one and cut it to your desired size.
Flower Pots. I bought mine from Amazon in a three pack for about $20, but you can use a pot you already have.
Something to hold the dowel steady in your flower pot. I used a paper cup that was just a bit shorter than my flower pot.
Hot Glue.
Small rocks to fill the base of the pot.
Poly foam or something to fill in your pot above the rocks.
A piece of felt cut into a circle.
Moss, straw, or rocks to go on the top of the pot. You can find some on Amazon here.
How To
You can catch my whole process for these topiaries in my video tutorial below! A few things to note: because the pom poms are top heavy, you will want to stabilize your dowel. You’ll see that I used a paper cup, hot glue, and small rocks to help hold the dowel with pom pom in place. I try to avoid using floral foam (even though it would have been easy to use in this project) because it is quite toxic if inhaled, and it is particularly bad for the environment. You could use a different technique to secure your dowel to your flower pot. If you need a refresher course on how to make a pom pom, you can watch my video for how to make the perfect pom pom here.
These topiaries would be the perfect spring or Easter centerpieces, could be fantastic on your mantle, or could be gifted for Mother’s Day. Make some mini ones to go with them by putting smaller pom poms in small flower pots. Together, they are darling spring decor! Grab all those bits and scraps and you’ll be able to have some of these topiaries in no time!