Paper Chandeliers
I have a slight obsession with craft supplies. Okay, I'm a craft hoarder. I can't help it! I just love all things crafty. If you are like me and have a surplus of craft supplies, this project will be perfect for you. Paper chandeliers are a gorgeous way to add a little color to any space, and each one is unique and personalizeable.
The great thing about these paper chandeliers is that you are the designer. I researched other paper chandeliers online and found many different varieties and forms. After a bit of trial and error, I found the method I liked best. You can make these your own by making them bigger, smaller, more colorful, less detailed, etc. For this tutorial, I'm going to show how to make a 19" chandelier, but please keep in mind that these instructions can be modified for any size you'd like to make.
Paper Chandelier Tutorial
Supplies Needed:
Metal or Wood Ring - the inside of a wooden embroidery hoop or a macrame hoop work well
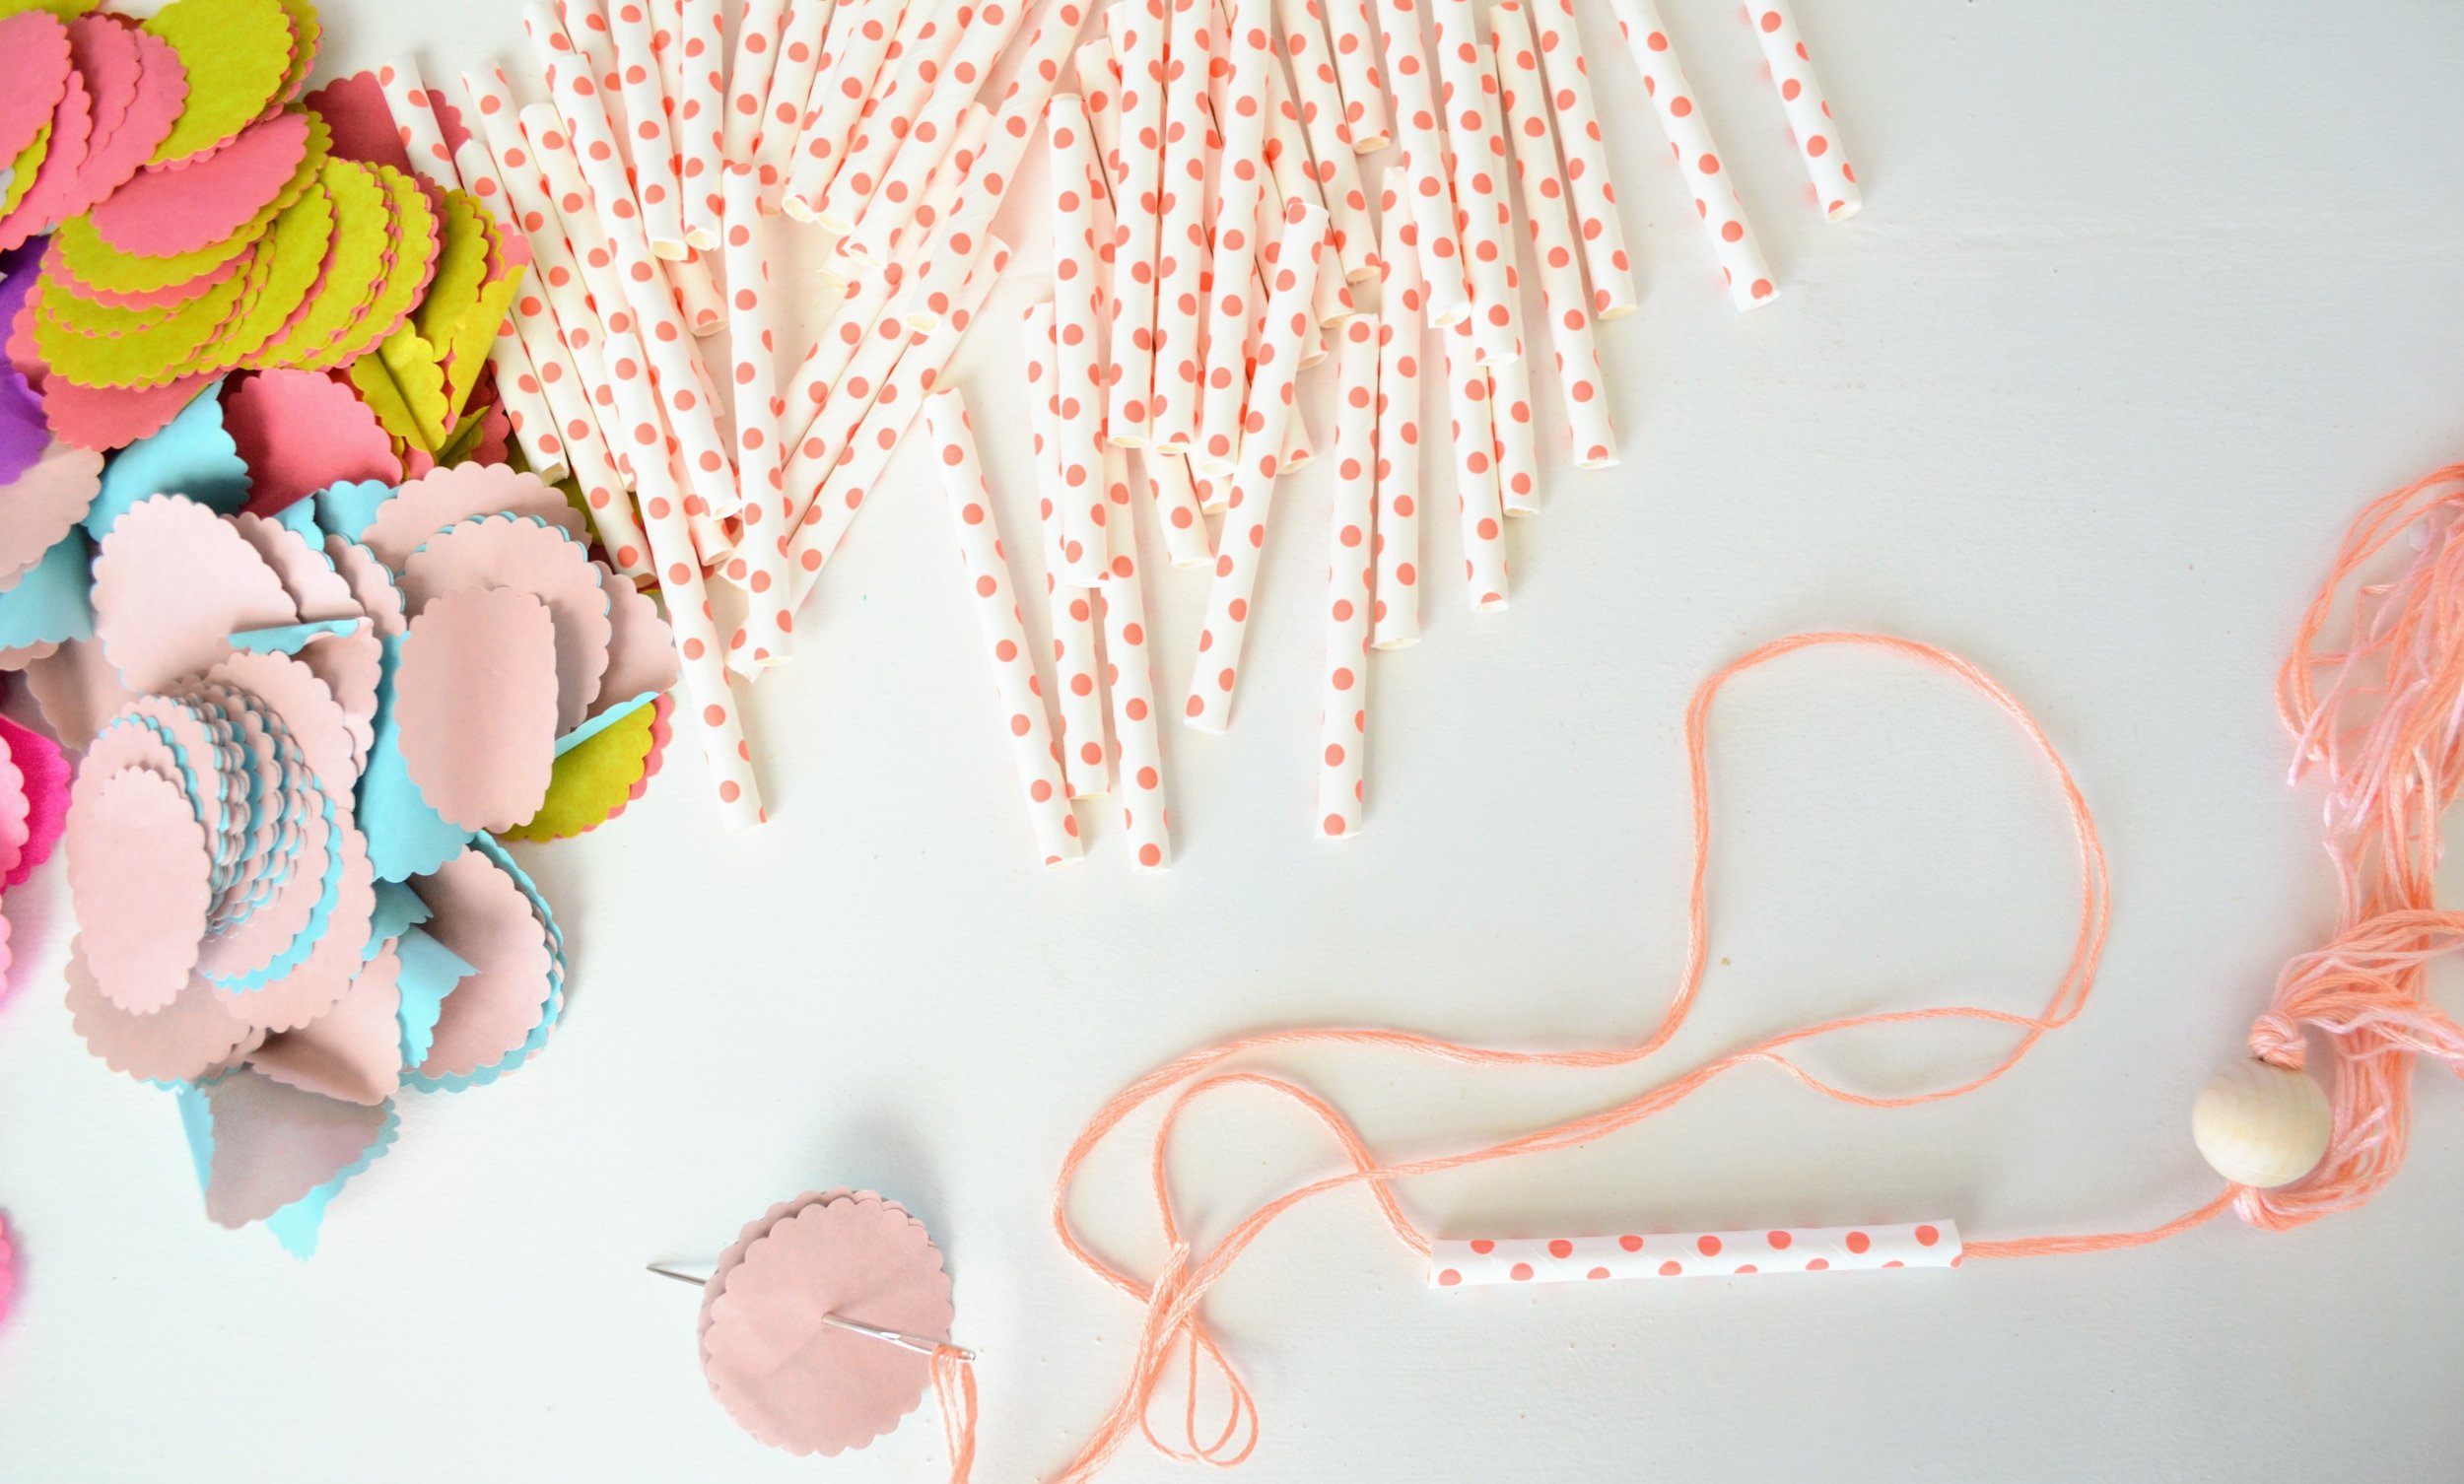
Paper Straws - This Set from Amazon is adorable
1" Hole Punch
String
Beads
Washi Tape
Needle
Ruler
Scissors
Yarn and/or Pom Poms and tassels (optional)

To start you need to prep all of the items you will be putting on your chandelier. Cut your string into 60" strands. I used colorful embroidery floss. I cut eight strands for this chandelier, but if you are making a smaller one, you may not want quite as many strands.
You will also need to cut your paper straws into smaller pieces. Because this is a big chandelier, I cut mine into 3" sections, but for smaller ones, you may want to cut your straws into 1.5" pieces. You will probably need more straws than you think...I ended up having to cut more half-way through, and it's easier to just cut a bunch at the beginning. I found these paper straws at Michael's, but Amazon also has a good selection, and Target often carries them in their Dollar Spot and party sections.

Next, you will need to cut a bunch of circles out of your tissue paper. I used a 1.5" scalloped hole punch to do this, but you can also just cut them by hand. I folded the tissue paper over several times and then punched so that I could punch through a bunch all at once. The tissue paper I used was from Target and had a different color on each side. Even if yours isn't different colors, any color will look cute. I also found that you will need more of these tissue paper circles than you think. You will use a bunch! Punch a lot now so that you do not need to stop in the middle to make more.


Now that you have your prep work done, you can start stringing your chandelier! Take your pieces of string and fold them in half. We want double the number of strings, which is why we fold it. If you want, you can slide a bead onto the folded part and then tie a knot, or you can leave the bead off and knot it. Just make sure you leave a little loop so that you can hang your chandelier. To start stringing, take two strands of string at a time, and thread your needle.

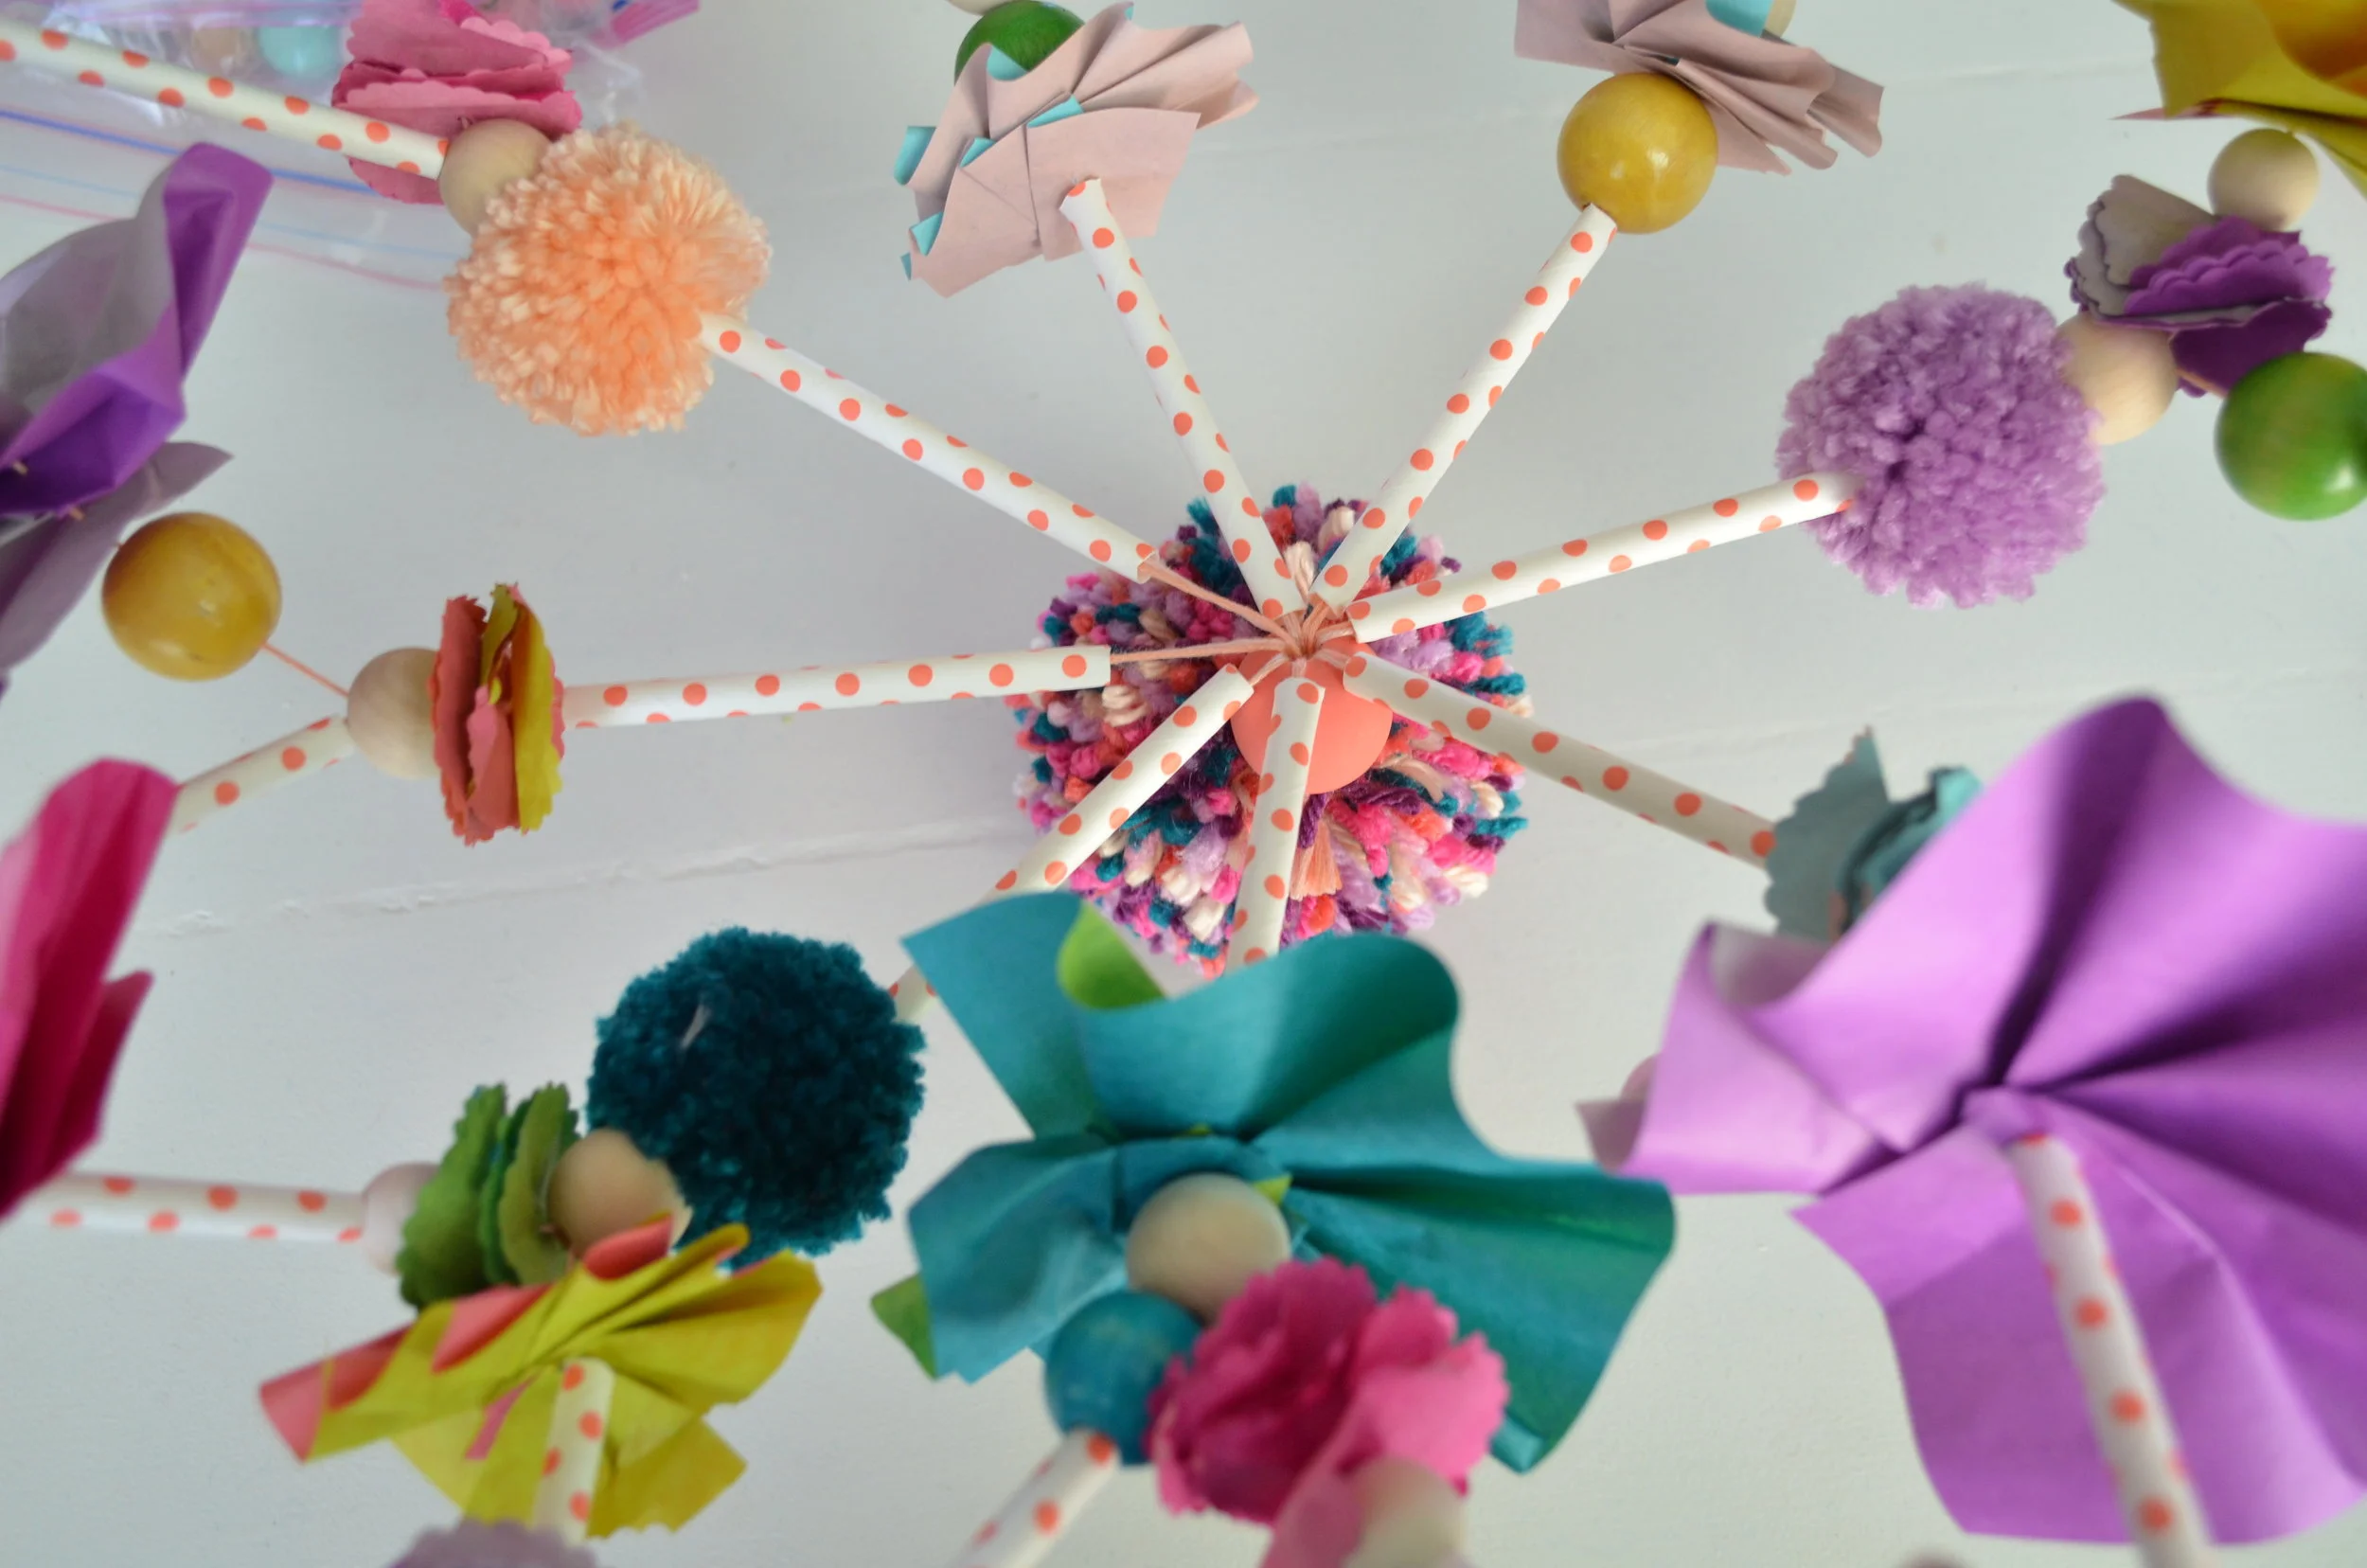
Start stringing! You can keep a consistent pattern, or change it up as you go. I decided to do all small tissue flowers and straws for the top half of my chandelier. Because the tissue paper is flat, I wrinkled the paper up a bit as I went along to give it a little dimension.
Continue to string your two strands of thread until you get to the desired length. I strung until about 14" was filled. At this point, to keep everything from sliding off, you can attach some washi tape to the bottom. If you are using heavier materials like lots of beads on this strand, you may want to use a binder clip to keep everything from sliding. But for lighter items, the washi tape works pretty well.

Continue to string every two strands of thread until they are all complete. You will want to try to make these sections about the same length as this will help keep the top half of your chandelier fairly even.

The next step is to connect your string to your hoop. I like to lay mine on the table on top of the hoop, and try to place the strings evenly around it. Tie each section of string onto the hoop and secure with washi tape. This will help hold the sections in place, but you will be able to adjust them later even if they slide around.


Now we are going to start stringing together the bottom half of the chandelier. I wanted the bottom of my chandelier to be more full, so I prepared some pom poms and bigger tissue paper flowers using the left over tissue paper scraps.

To make the bigger tissue flowers, I just folded strips of paper into a circular shape. If you string through the ends, it will hold itself together without any glue, but you can always add a few dots of glue to secure them.

To start stringing the bottom half, take just ONE strand from a section, and thread the needle. You will continue to string as you did before adding straws, paper flowers, pom poms, beads, etc.

Now take a single string from the neighboring section and string that one like you did the first. Once they are both about the same length, you are going to join them together making a triangle. Thread the needle onto both of the strings, and add your straws and flowers again. Secure the end with more washi tape. Continue all the way around the hoop.

When all the strings are complete, gather up all the sections and hold them so that the chandelier is hanging upside down.

Connect all of the strands with a bead and a knot or even just a knot. I added a bead and attached a pom pom to the bottom. A tassel would also be a cute addition to this bottom part.
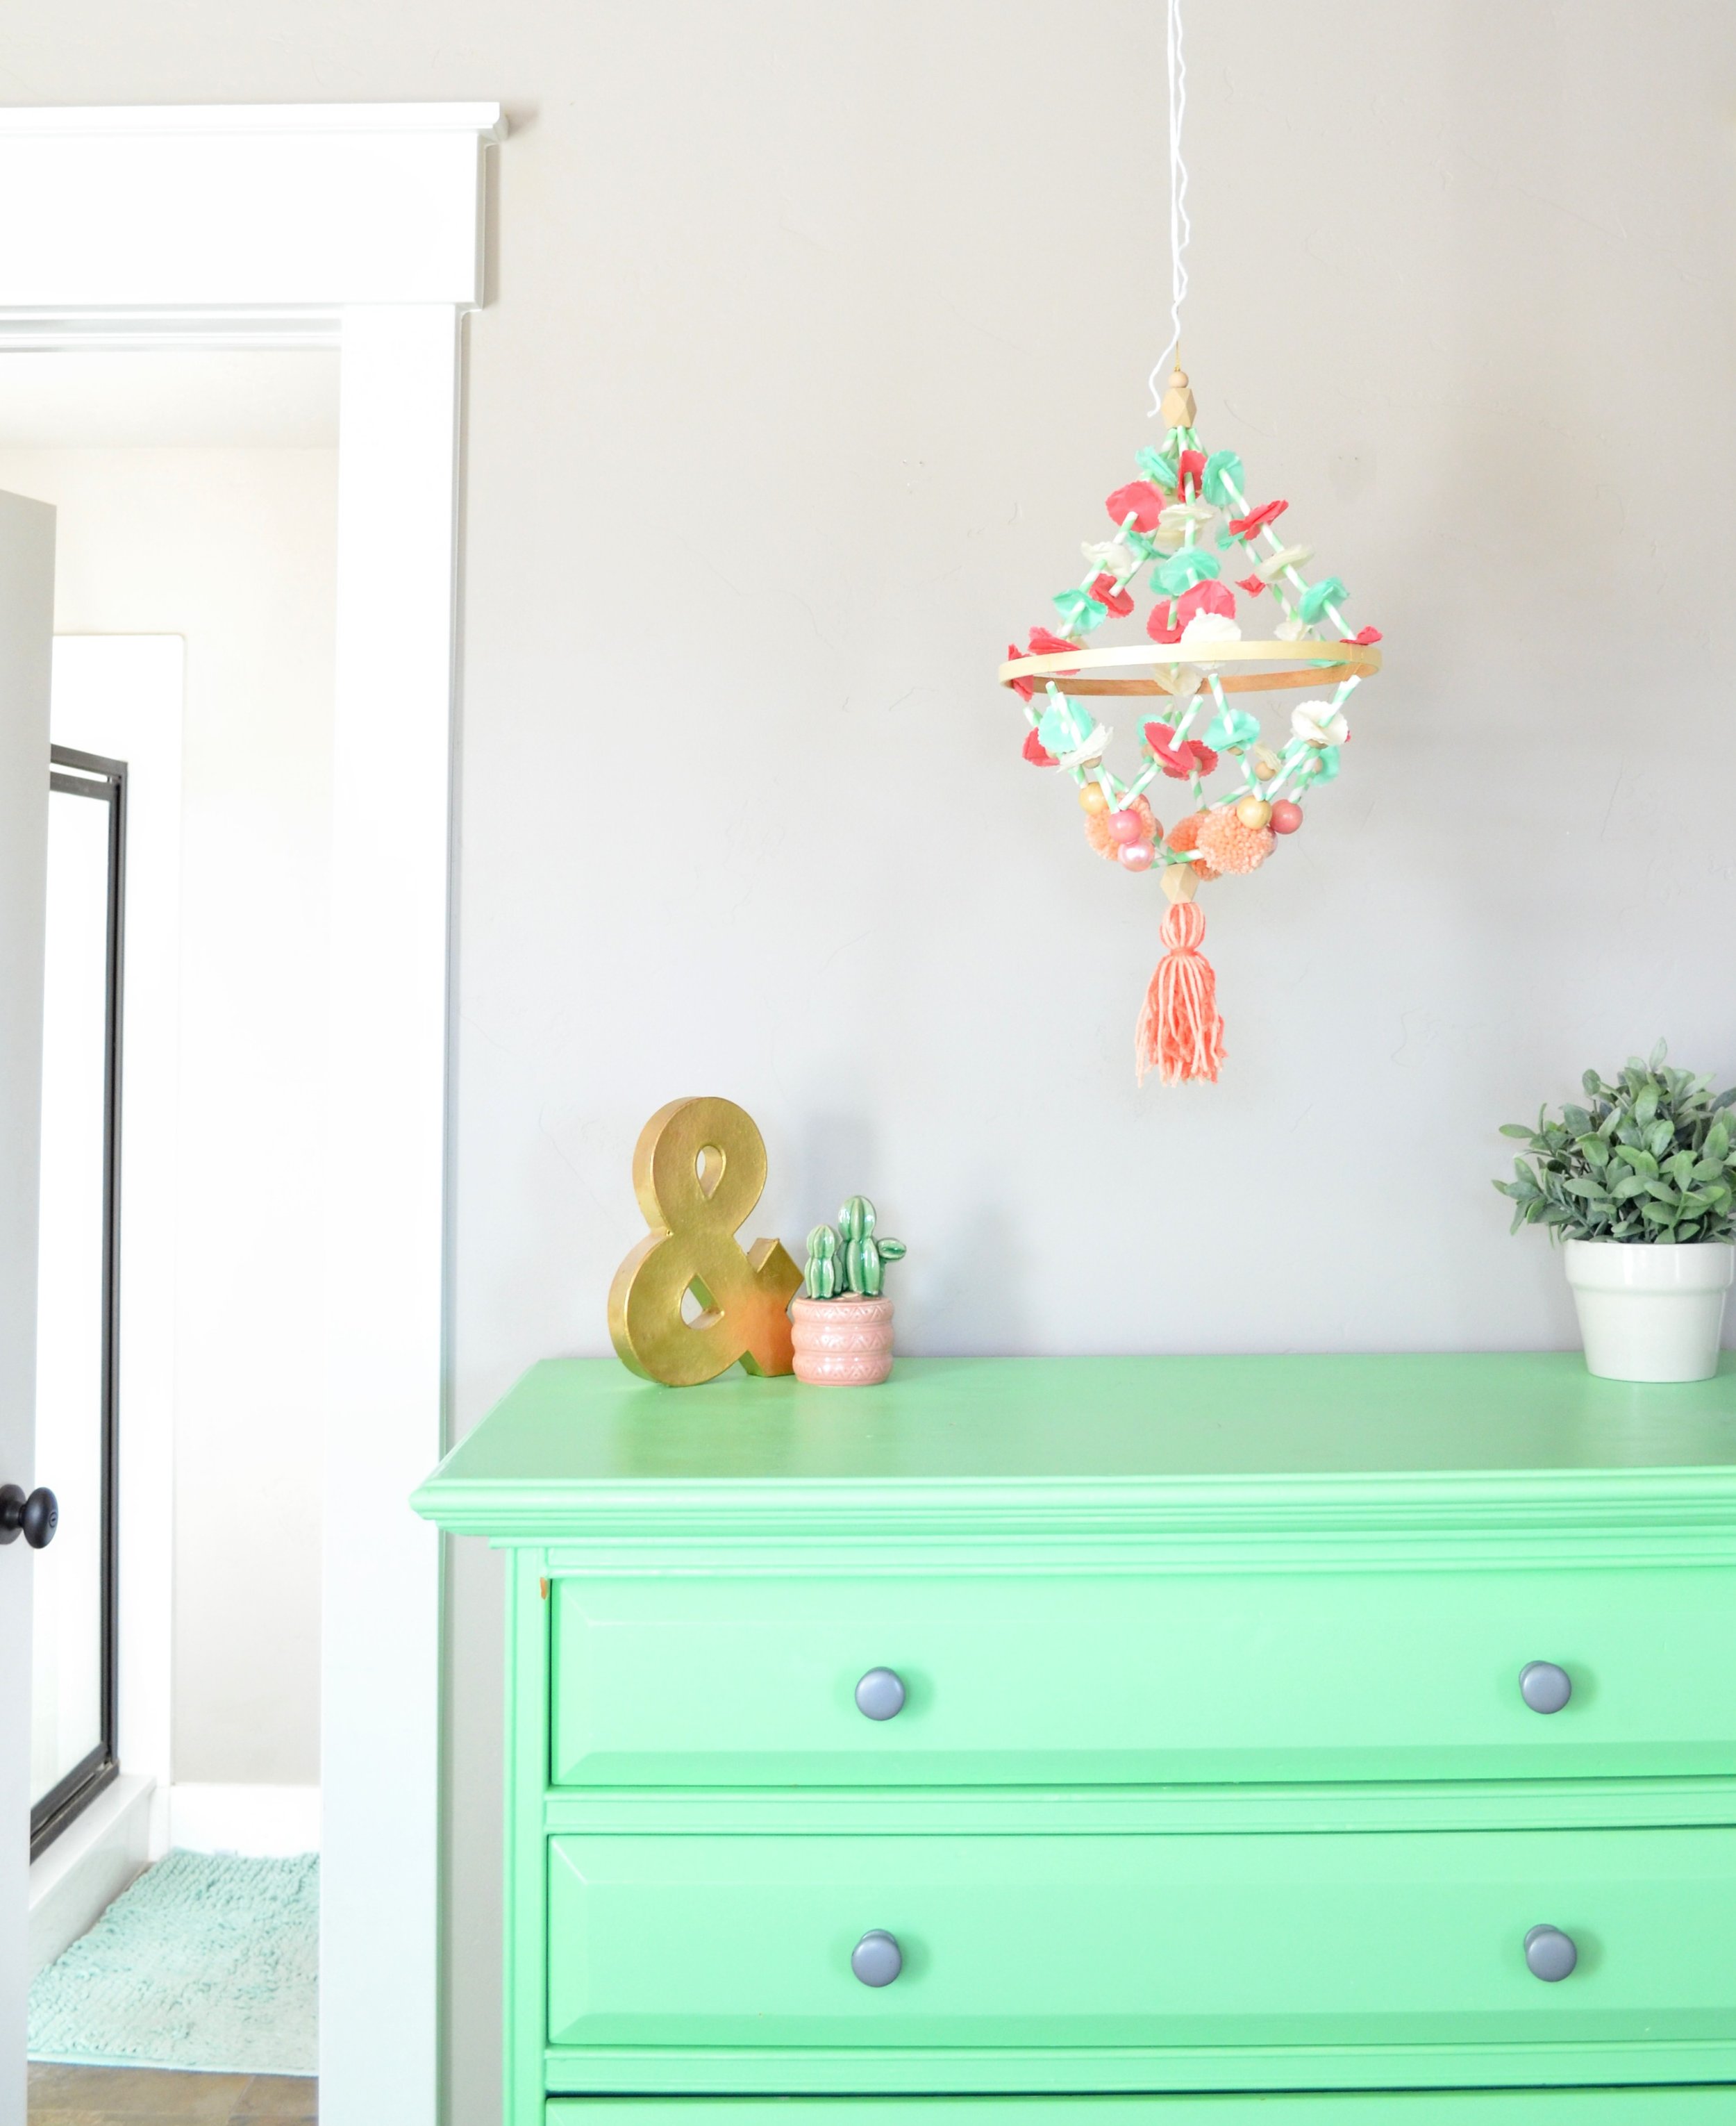
You can hang your chandelier from a 3M hook. I like the kind that has a metal piece that can move to adjust for hanging. I love using these as a hanging centerpiece at parties or even above my daughters' dresser in their room. Such a fun way to add some color to any room! Hopefully it can help you use up some of that craft stash too! Enjoy!